- Historia militar de Australia
-
La historia militar de Australia abarca los 220 años de historia moderna, desde las primeras Australian frontier wars entre Aborígenes y europeos a los conflictos en curso en Irak y Afganistán en los primeros años del siglo XXI. Aunque esta historia es corta en comparación con la de muchos otros países, Australia ha participado en numerosos conflictos y guerras, y la guerra y el servicio militar ha sido una gran influencia en la sociedad australiana y la identidad nacional, incluyendo el espíritu de Anzac. La relación entre la guerra y la sociedad australiana también ha sido moldeada por los temas perdurables de la cultura australiana estratégica y su único dilema de la seguridad.
Como colonia británica, Australia participó en las guerras pequeñas de Gran Bretaña del siglo XIX, mientras que más adelante como una nación independiente que luchó en la Primera y Segunda Guerra Mundial, así como en las guerras de Corea, Malaya, Borneo and Vietnam durante la Guerra Fría. En la era post-Vietnam, las fuerzas australianas han participado en numerosas misiones de mantenimiento de la paz internacional, a través de las Naciones Unidas y otras agencias, incluyendo la Golfo Pérsico, Ruanda, Somalia, Timor Oriental y las Islas Salomón, mientras que más recientemente también han luchado como parte de las fuerzas multilaterales en Irak y Afganistán. En total, cerca de 103.000 australianos murieron en el transcurso de estos conflictos.[note 1]
Contenido
La guerra y la sociedad australiana
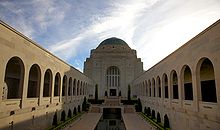 The interior courtyard of the Australian War Memorial en Canberra. Casi 877.000 personas visitaron el Australian War Memorial en 2009-10 y otras 204.000 visitaron sus exposiciones itinerantes.[1]
Para la mayor parte del siglo pasado, el servicio militar ha sido una de las mejores experiencias compartidas única de los hombres blancos de Australia, y aunque esto está cambiando debido a la profesionalización de las fuerzas armadas y la ausencia de guerras importantes durante la segunda mitad del siglo XX, sigue influyendo en la sociedad australiana de hoy.[2] Como por ejemplo la guerra y el servicio militar ha sido la definición de las influencias en la historia australiana, mientras que una parte importante de la identidad nacional se ha basado en una concepción idealizada de la experiencia australiana de la guerra y de la milicia, conocida como el espíritu de Anzac. Estos ideales encuentran las nociones de resistencia, coraje, ingenio, humor, larrikinism, igualitarismo y compañerismo, rasgos que, de acuerdo al pensamiento popular, definen el comportamiento de los soldados australianos en Gallipoli durante la Primera Guerra Mundial.[2] La campaña de Gallipoli fue uno de los primeros acontecimientos internacionales que vieron los australianos y, como tal, ha sido vista como un evento clave en la creación de un sentido de identidad nacional.[3]
La relación entre la guerra y la sociedad australiana ha sido formado por dos de los temas más perdurables de la cultura estratégica de Australia: bandwagoning con un poderoso aliado, y la guerra expedicionaria.[4] De hecho, la política de defensa de Australia estaba estrechamente vinculada a Gran Bretaña hasta que la Japanese crisis of 1942, while since then an alliance with the United States has underwritten its security. Podría decirse que este patrón de llevar la delantera, tanto por razones culturales como los valores y creencias compartidas, así como para la seguridad de las preocupaciones más pragmáticas, ha asegurado que la política estratégica de Australia a menudo ha sido definida por las relaciones con sus aliados. No obstante, una tendencia a la complacencia estratégica también ha sido evidente, con los australianos suelen ser reacios a pensar en temas de defensa y la asignación de recursos hasta que surge una crisis, un rasgo que ha resultado históricamente en la falta de preparación para los principales desafíos militares.[4] [5]
Reflecting both the realist and liberal paradigms of international relations and the conception of national interests, a number of other important themes in Australian strategic culture are also obvious. Such themes include: an acceptance of the state as the key actor in international politics, the centrality of notions of Westphalian sovereignty, a belief in the enduring relevance and legitimacy of armed force as a guarantor of security, and the proposition that the status quo in international affairs should only be changed peacefully.[6] Likewise multilateralism, collective security and defence self-reliance have also been important themes.[7] Change has been more evolutionary than revolutionary and these strategic behaviours have persisted throughout its history, being the product of Australian society's democratic political tradition and Judaeo-Christian Anglo-European heritage, as well its associated values, beliefs and economic, political and religious ideology.[8] Igualmente, sin embargo, estos comportamientos son también un reflejo de su exclusiva security dilemma as a largely European island on the edge of the Asia-Pacific, and the geopolitical circumstances of a middle power physically removed from the centres of world power. To be sure, during threats to the core Australia has often found itself defending the periphery and perhaps as a result, it has frequently become involved in foreign wars.[7] Throughout these conflicts Australian soldiers—known colloquially as Diggers—have often been noted, perhaps paradoxically, for both their fighting abilities and their humanitarian qualities.[2]
Era colonial
Fuerzas británicas en Australia, 1788–1870
Desde 1788 hasta 1870 la defensa de las colonias australianas fue proporcionada por las fuerzas regulares del Ejército Británico. Originalmente, los Marines protegían los primeros asentamientos en Sydney Cove e Isla Norfolk, sin embargo, fueron relevados de estas obligaciones en 1790 por una unidad especialmente reclutada para el servicio colonial, conocida como la New South Wales Corps. posteriormente participó en el aplastamiento de una rebelión de presos irlandeses en Castle Hill en 1804. Pronto, sin embargo las deficiencias en los cuerpos convencieron al War Office de la necesidad de una guarnición más fiable en New South Wales y Van Diemen’s Land. La principal de estas deficiencias era la Rebelión del Ron, un golpe de Estado montado por sus funcionarios en 1808. Como resultado de ello, en enero de 1810, el 73rd (Perthshire) Regiment of Foot arribó a Australia. En 1870, 25 regimientos de infantería británica habían servido en Australia, al igual que un pequeño número de unidades de artillería e ingenieros.[9]
Aunque la función principal del ejército británico era proteger a las colonias contra los ataques externos, no una amenaza real nunca se materializó. El Ejército británico se utilizó en lugar de policía, guardia convictos en las instituciones penales, la lucha contra la bushranging, dejando condenar a rebeliones, como ocurrió en Bathurst in 1830—y para suprimir la resistencia aborigen a la extensión de la colonización europea. Cabe destacar que los soldados británicos estaban involucrados en la batalla de la Eureka Stockade en 1854 en las minas de oro de Victoria. Los miembros de los regimientos británicos estacionados en Australia también vieron acción en India, Afganistán, Nueva Zelanda y Sudán.[10]
Durante los primeros años de asentamiento, la defensa naval de Australia fue proporcionada por unidades separadas de la Royal Navy de la East Indies Station, con sede en Sydney. Sin embargo, en 1859 Australia fue establecida como un escuadrón separado bajo el mando de un comodoro, marcando la primera ocasión en que buques de la Armada Real había sido permanentemente en Australia. La Royal Navy se mantuvo como la primera fuerza naval en aguas australianas hasta 1913, cuando la Australia Station cesó y la responsabilidad fue entregada a la Royal Australian Navy; the Royal Navy's depots, dockyards and structures were gifted to the Australian people.[11]
Guerra de Frontera, 1788–1930
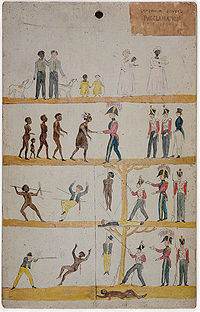 Poster issued in Van Diemen's Land during the Black War implying a policy of friendship and equal justice for white settlers and Indigenous Australians. Such a policy did not actually exist at the time.[12]
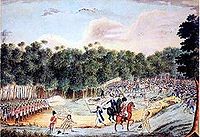
Las reacciones de los habitantes nativos aborígenes a la repentina aparición de los colonos británicos en Australia fueron variadas, pero inevitablemente hostil cuando la presencia del colono llevó a la competencia por los recursos, y para la ocupación de las tierras de los habitantes indígenas. Las enfermedades europeas diezmaron las poblaciones aborígenes y la ocupación o destrucción de las tierras y los recursos alimentarios llevaban a veces a la inanición.[13] Por lo general, ni los británicos ni los aborígenes se acercó al conflicto en un sentido organizado y el conflicto se produjo entre grupos de colonos y las tribus individuales en lugar de la guerra sistemática.[13] A veces, sin embargo, las guerras fronterizas vio la participación de los soldados británicos y más tarde la policía montada unidades. No todos los grupos aborígenes resistieron a la invasión blanca en sus tierras, mientras que muchos aborígenes servido en unidades de la policía montada y estuvieron involucrados en ataques contra otras tribus.[13]
Los enfrentamientos entre los aborígenes y los europeos fue localizado mientras los primeros no formaban confederaciones capaces de una resistencia sostenida. Como resultado, no hubo una sola guerra, sino más bien una serie de compromisos violentos y masacres en todo el continente.[14] Organizado o desorganizada sin embargo, un patrón de la guerra de frontera surgió con el comienzo de la resistencia aborigen en el siglo 18 y continúa en el siglo 20. Esta guerra contradice lo popular y lo académico, a veces "mito" de la solución pacífica de Australia. Frente a los colonos la resistencia aborigen a menudo reaccionan con violencia, resultando en una serie de masacres indiscriminadas. Entre los más famosos es la Battle of Pinjarra en Australia Occidental en 1834. Estos incidentes no fueron sancionados oficialmente sin embargo, y después de la Myall Creek massacre en Nueva Gales del Sur en 1838, siete europeos fueron ahorcados por su participación en los asesinatos.[15] Sin embargo, en Tasmania, la llamada Guerra Negra se libró entre 1828 y 1832 y la intención de expulsar a la mayoría de los habitantes nativos de la isla en una serie de penínsulas aisladas. A pesar de que se inició en el fracaso de los británicos, que finalmente resultó en bajas considerables entre la población nativa.[16] [17]
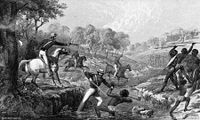
Será inexacta, sin embargo, para describir el conflicto como una cara y, principalmente, perpetrado por los europeos sobre los aborígenes. Aunque muchos aborígenes murieron más que británicos, esto puede haber tenido más que ver con las ventajas tecnológicas y logísticas que disfrutan los europeos.[18] Las tácticas de los aborígenes variadas, pero se basa principalmente en las prácticas pre-existentes de caza y lucha-la utilización de lanzas, palos y otras armas primitivas. A diferencia de los pueblos indígenas de Nueva Zelanda y Norteamérica, de los aborígenes principales no lograron adaptarse a afrontar el reto de los europeos. Aunque hubo algunos casos de individuos y grupos de adquirir y utilizar armas de fuego, esto no era generalizado.[19] Los aborígenes no eran una amenaza militar seria para los colonos europeos, independientemente de la cantidad de los colonos que puedan tener que temer.[20] En ocasiones los grandes grupos de aborígenes atacaron a los colonos en terreno abierto y se produjo una batalla convencional, en la que los aborígenes intentarían utilizar un número superior a su beneficio. Esto a veces puede ser eficaz, con informes de que el avance en la formación de media luna en un intento de rebasar y rodear a sus oponentes, a la espera de la primera ráfaga de disparos y lanzando sus lanzas, mientras que los colonos a cargar. Por lo general, la guerra abierta resultó ser más costosa para los aborígenes que para los europeos, sin embargo.[21]
Fundamental para el éxito de los europeos fue el uso de armas de fuego. Sin embargo, las ventajas proporcionadas por las armas de fuego han sido a menudo exagerada. Antes de finales del siglo 19, las armas de fuego a menudo engorroso fusiles: avancarga, de ánima lisa, armas solo tiro con fusil de mecanismo de chispa . Este tipo de armas produce un bajo índice de fuego, mientras que sufren de una alta tasa de fracaso y sólo se precisa en 50 metros (164,041995 ft). These deficiencies may have given the Aborigines an advantage, allowing them to move in close and engage with spears or clubs. By 1850 significant advances in firearms gave the Europeans a distinct advantage, with the six-shot Colt revolver, the Snider single shot breech-loading rifle and later the Martini-Henry rifle así como rifles de tiro rápido, como el Winchester rifle, haciendo disponibles. Estas armas, cuando se utiliza en campo abierto y se combina con la movilidad superior proporcionada por caballos para rodear y comprometer a los grupos de aborígenes, a menudo tuvo éxito. Los europeos también se tuvieron que adaptar sus tácticas para luchar contra su rápido movimiento, los enemigos de manera oculta. Tácticas empleadas durante la noche incluyen ataques por sorpresa, y las fuerzas de la posición para conducir a los nativos por los acantilados o los obligaban a refugiarse en los ríos mientras eran atacados desde las dos orillas.[22]
El conflicto se prolongó por más de 150 años y la cara de la batalla siguió el patrón del asentamiento británico en Australia.[23] A partir de Nueva Gales del Sur con la llegada de los europeos en mayo de 1788, continuó en Sydney y sus alrededores hasta la década de 1820. A medida que la frontera avanzaba hacia el oeste lo hicieron en el conflicto, presionando en interior de Nueva Gales del Sur en la década de 1840. En Tasmania, la lucha se remonta desde 1804 hasta la década de 1830, mientras que en Victoria y en el sur de Australia del Sur, la mayoría de la violencia durante los años 1830 y 1840. El sur-oeste de Australia Occidental la guerra experimentó desde 1829 hasta 1850. La guerra en Queensland se inició en el área alrededor de Brisbane en la década de 1840 y continuó hasta 1860, pasando al centro de Queensland, en la década de 1850 y 1860, y luego en el norte de Queensland desde 1860 hasta 1900. En Australia Occidental, la violencia se trasladó al norte de la colonización europea se trasladó al norte, llegando a la Kimberley region
en 1880, con enfrentamientos violentos que continuaron hasta la década de 1920. En el Territorio del Norte el conflicto duró incluso más tarde aún, sobre todo en el centro de Australia, continuando a partir de 1880 hasta la década de 1930. Una estimación de las bajas lugares muertes Europea en 2500, mientras que al menos 20.000 aborígenes se cree que han perecido. Mucho más devastador, sin embargo, fue el efecto de la enfermedad que redujo considerablemente la población indígena a principios del siglo 20, hecho que también puede haber limitado su capacidad para resistir la invasión.[24]
Guerras de Nueva Zelanda, 1861–1864
Guerra Taranaki
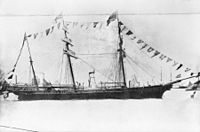
In 1861, the Victorian ship Māori in Taranaki. Victoria was subsequently used for patrol duties and logistic support, although a number of personnel were involved in actions against Māori fortifications. One sailor died from an accidental gunshot wound during the deployment.[25]
Invasión del Waikato
A finales de 1863, el gobierno de Nueva Zelandia pidió tropas para ayudar en la invasión de la provincia de Waikato en contra de los maoríes. El asentamiento prometió en tierras confiscadas, más de 2.500 australianos (más de la mitad de los cuales eran de Victoria) fueron reclutados para formar cuatro regimientos de Waikato. Otros exploradores australianos se convirtieron en la compañía de los guardabosques. A pesar de experimentar condiciones difíciles, los australianos no estaban muy involucrados en la batalla, y se utiliza principalmente para patrullar y servicios de guarnición. Los australianos estuvieron involucrados en las acciones a Matarikoriko, Pukekohe East, Titi Hill, Orakau and Te Ranga. Menos de 20 se cree que han muerto en acción.[25] [26] El conflicto terminó en 1864, y los Regimientos de Waikato se disolvió en 1867. Sin embargo, muchos de los soldados que habían elegido para reclamar tierras de cultivo en el cese de las hostilidades habían llegado a los pueblos y ciudades a finales de la década, mientras que otros muchos habían regresado a Australia.[27]
Colonial military forces, 1870–1901
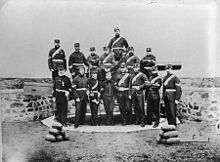
De 1870 a 1901, cada uno de los seis gobiernos coloniales era responsable de su propia defensa. Las colonias habían ganado gobierno responsable entre 1855 y 1890, y mientras la Oficina Colonial en Londres se les requería el control, retuvo el control de algunos asuntos, el Gobernador de cada colonia debía levantar su propia milicia colonial. Para hacer esto, los concedieron la autoridad de la corona británica para levantar militares y fuerzas navales. Al principio estos eran milicias en apoyo de regulars británico, pero cuando el apoyo militar a las colonias terminaron en 1870, las colonias asumieron sus propias responsabilidades de defensa. Las fuerzas coloniales militares incluyeron la milicia de voluntario impagada, pagó a soldados ciudadanos, y un pequeño componente permanente. Ellos eran principalmente la infantería, la caballería y montaron la infantería, y fueron ni almacenados en cuarteles, ni sujeto a la disciplina militar total. Incluso después de reformas significativas en la incluídas en los años de 1870 incluyendo la extensión de las fuerzas permanentes para incluir engineer and artillery units—they remained too small and unbalanced to be considered armies in the modern sense. By 1885, the forces numbered 21,000 men. Although they could not be compelled to serve overseas many volunteers subsequently did see action in a number conflicts of the British Empire during the 19th century, with the colonies raising contingents to serve in Sudan, South Africa and China.[28]
A pesar de una reputación de inferioridad colonial, muchas de las unidades en la zona levantadas sumamente fueron organizadas, disciplinados, profesionales y bien entrenados. Durante este período, las defensas en Australia principalmente giraron alrededor de la defensa estática por la infantería combinada y la artillería, basada en fortalezas costeras. However by the 1890s, improved railway communications between the mainland eastern colonies led Major General James Edwards—who had recently completed a survey of colonial military forces—to the belief that the colonies could be defended by the rapid mobilisation of brigades of infantry. As a consequence he called for a restructure of defences, and defensive agreements to be made between the colonies. Edwards argued for the colonial forces to be federated and for professional units—obliged to serve anywhere in the South Pacific—to replace the volunteer forces. These views found support in the influential New South Wales Commandant, Major General Edward Hutton, however suspicions held by the smaller colonies towards New South Wales and Victoria stifled the proposal.[28] Despite these reforms remaining unresolved, defence issues were increasingly driving debate on the political federation of the colonies.
With the exception of Western Australia, the colonies also operated their own navies. In 1856, Victoria received its own naval vessel, Plantilla:HMS on loan from the Royal Navy, three small gunboats and five torpedo-boats. New South Wales formed a Naval Brigade in 1863 and by the turn of the century had two small torpedo-boats and a corvette. The Queensland Maritime Defence Force was established in 1885, while South Australia operated a single ship, Boxer Rebellion in China in 1900, while HMCS Protector was sent by South Australia but saw no action.[30] The separate colonies maintained control over their military and naval forces until Federation in 1901, when they were amalgamated and placed under the control of the new Commonwealth of Australia.[31]
Sudan, 1885
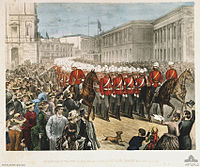
During the early years of the 1880s, an Egyptian regime in the Sudan, backed by the British, came under threat from rebellion under the leadership of native Muhammad Ahmad (or Ahmed), known as Mahdi to his followers. In 1883, as part of the Mahdist War, the Egyptians sent an army to deal with the revolt, but they were defeated and faced a difficult campaign of extracting their forces. The British instructed the Egyptians to abandon the Sudan, and sent General Charles Gordon to coordinate the evacuation, but he was killed in January 1885. When news of his death arrived in New South Wales in February 1885, the government offered to send forces and meet the contingent's expenses.[32] The New South Wales Contingent consisted of an infantry battalion of 522 men and 24 officers, and an artillery battery of 212 men and sailed from Sydney on 3 March 1885.[33]
The contingent arrived in Suakin on 29 March and were attached to a brigade that consisted of Scots, Grenadier and Coldstream Guards. They subsequently marched for Tamai in a large "square" formation made up of 10,000 men. Reaching the village, they burned huts and returned to Suakin: three Australians were wounded in minor fighting. Most of the contingent was then sent to work on a railway line that was being laid across the desert towards Berber, on the Nile. The Australians were then assigned to guard duties, but soon a camel corps was raised and 50 men volunteered. They rode on a reconnaissance to Takdul on 6 May and were heavily involved in a skirmish during which more than 100 Arabs were killed or captured.[33] On 15 May, they made one last sortie to bury the dead that were killed from the fighting of the previous March. The artillery were posted at Handoub and drilled for a month, but they soon rejoined the camp at Suakin.[32]
The British government decided that the campaign in Sudan was not worth the effort required and left a garrison in Suakin. The New South Wales Contingent sailed for home on 17 May, arriving in Sydney on 19 June 1885.[32] Approximately 770 Australians served in Sudan; nine subsequently died of disease during the return journey while three had been wounded during the campaign.[34]
Segunda Guerra Bóer, 1899–1902
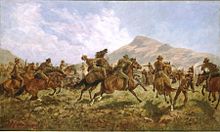
La invasión británica en las áreas de Sudáfrica ya resueltos por los bóers afrikaner y la competencia por recursos y tierras que se desarrolló entre ellos como consecuencia de ello, llevó a la Segunda Guerra Boer en 1899 . Adelantarse al despliegue de las fuerzas británicas, las repúblicas afrikaner del Estado Libre de Orange y la República de Transvaal bajo la presidencia de Paul Kruger declaró la guerra el 11 de octubre de 1899, atacando con profundidad en los territorios británicos de Natal y la Colonia del Cabo.[35] After the outbreak of war, plans for the dispatch of a combined Australian force were subsequently set aside by the British War Office and each of the six colonial governments sent separate contingents to serve with British formations, with two squadrons each of 125 men from New South Wales and Victoria, and one each from the other colonies.[36] Las primeras tropas llegaron al lugar tres semanas más tarde, con los Lanceros de Nueva Gales del Sur, que había estado entrenando en Inglaterra antes de la guerra, se apresuró a desviar a Sudáfrica. El 22 de noviembre, los lanceros fueron atacados por primera vez cerca de Belmont, y que posteriormente obligó a los atacantes a retirarse después de infligir bajas significativas.[37]
Tras una serie de pequeñas victorias, los británicos sufrieron un importante revés en Semana Negra entre el 10 y 17 de diciembre de 1899, aunque ninguna unidad australiana estaba involucrada. Los primeros contingentes de infantería de Victoria, Australia del Sur, Australia Occidental y Tasmania llegó a Ciudad del Cabo el 26 de noviembre y fueron designados Australian Regiment under the command of Colonel John Charles Hoad. With a need for increased mobility, they were soon converted into mounted infantry. Further units from Queensland and New South Wales arrived in December and were soon committed to the front.[38] The first casualties occurred soon after at Sunnyside on 1 January 1900, after 250 Queensland Mounted Infantry and a column of Canadians, British and artillery attacked a Boer laager at Belmont. Troopers David McLeod and Victor Jones were killed when their patrol clashed with the Boer forward sentries. Regardless, the Boers were surprised and during two hours of heavy fighting, more than 50 were killed and another 40 taken prisoner. Five hundred Queenslanders and the New South Wales Lancers subsequently took part in the Siege of Kimberley in February 1900.[39]Despite serious set-backs at Colenso, Stormberg, Magersfontein, and Spion Kop in January—and with Ladysmith still under siege—the British mounted a five division counter-invasion of the Orange Free State in February. The attacking force included a division of cavalry commanded by Lieutenant General John French with the New South Wales Lancers, Queensland Mounted Infantry and New South Wales Army Medical Corps attached.[40] First, Kimberley was relieved following the battles of Modder River and Magersfontein, and the retreating Boers defeated at Paardeberg, with the New South Wales Mounted Rifles locating the Boer general, Piet Cronje. The British entered Bloemfontein on 13 March 1900, while Ladysmith was relieved. Disease began to take its toll and scores of men died. Still the advance continued, with the drive to Pretoria in May including more than 3,000 Australians. Johannesburg fell on 30 May, and the Boers withdrew from Pretoria on 3 June. The New South Wales Mounted Rifles and Western Australians saw action again at Diamond Hill on 12 June. Mafeking was relieved on 17 May.[41]
Following the defeat of the Afrikaner republics still the Boers held out, forming small commando units and conducting a campaign of guerrilla warfare in order to disrupt British troop movements and lines of supply. This new phase of resistance led to further recruiting in the Australian colonies and the raising of the Bushmen's Contingents, with these soldiers usually being volunteers with horse-riding and shooting skills, but little military experience. After Federation in 1901, eight Australian Commonwealth Horse battalions of the newly created Australian Army were also sent to South Africa, although they saw little fighting before the war ended.[36] Some Australians later joined local South African irregular units, instead of returning home after discharge. These soldiers were part of the British Army, and were subject to British military discipline. Such units included the Bushveldt Carbineers which gained notoriety as the unit in which Harry "Breaker" Morant and Peter Handcock served in before their court martial and execution for war crimes.[42]
With the guerrillas requiring supplies, Koos de la Rey lead a force of 3,000 Boers against Brakfontein, on the Elands river in Western Transvaal. The post held a large quantity of stores and was defended by 300 Australians and 200 Rhodesians. The attack began on 4 August 1900 with heavy shelling causing 32 casualties. During the night the defenders dug in, enduring shelling and rifle fire. A relief force was stopped by the Boers, while a second column turned back believing that the post had already been relieved. The siege lasted 11 days, during which more than 1,800 shells were fired into the post. After calls to surrender were ignored by the defenders, and not prepared to risk a frontal attack, the Boers eventually retired. The Siege of Elands River was one of the major achievements of the Australians during the war, with the post finally relieved on 16 August.[43]
In response the British adopted counter-insurgency tactics, including a scorched earth policy involving the burning of houses and crops, the establishment of concentration camps for Boer women and children, and a system of blockhouses and field obstacles to limit Boer mobility and to protect railway communications. Such measures required considerable expenditure, and caused much bitterness towards the British, however they soon yielded results.[44] By mid-1901, the bulk of the fighting was over, and British mounted units would ride at night to attack Boer farmhouses or encampments, overwhelming them with superior numbers. Indicative of warfare in last months of 1901, the New South Wales Mounted Rifles travelled 1.814 millas (2.919,350016 km) and were involved in 13 skirmishes, killing 27 Boers, wounding 15, and capturing 196 for the loss of five dead and 19 wounded.[45] Other notable Australian actions included Slingersfontein, Pink Hill, Rhenosterkop and Haartebeestefontein.[46]
Australians were not always successful however, suffering a number of heavy losses late in the war. On 12 June 1901, the 5th Victorian Mounted Rifles lost 19 killed and 42 wounded at Wilmansrust, near Middleburg after poor security allowed a force of 150 Boers to surprise them.[44] [47] On 30 October 1901, Victorians of the Scottish Horse Regiment also suffered heavy casualties at Gun Hill, although 60 Boers were also killed in the engagement. Meanwhile at Onverwacht on 4 January 1902, the 5th Queensland Imperial Bushmen lost 13 killed and 17 wounded.[42]
Ultimately the Boers were defeated however, and the war ended on 31 May 1902. In all 16,175 Australians served in South Africa, and perhaps another 10,000 enlisted as individuals in Imperial units; casualties included 251 killed in action, 267 died of disease and 43 missing in action, while a further 735 were wounded.[48] [49] Six Australians were awarded the Victoria Cross.[50]
Rebelión Bóxer, 1900–1901
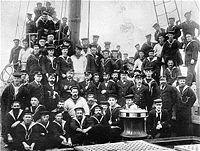
La Rebelión Bóxer en China, en 1900, y una serie de países occidentales-entre ellos las potencias europeas, los Estados Unidos y Japón, pronto las fuerzas enviadas como parte de China Field Force para proteger sus intereses. En junio, el gobierno británico solicitó permiso de las colonias de Australia para enviar barcos de la escuadra australiana a China. Las colonias también se ofrecieron a ayudar más, pero como la mayoría de sus tropas estaban todavía en el sur de África, tuvieron que recurrir a las fuerzas navales por mano de obra. La fuerza envió una embarcación modesta, con Gran Bretaña aceptando 200 hombres de Victoria, 260 de Nueva Gales del Sur y el barco australiano HMCS Protector, a las órdenes del capitán William Creswell.[51] Most of these forces were made up of naval brigade reservists, who had been trained in both ship handling and soldiering to fulfil their coastal defence role.
Los contingentes de Nueva Gales del Sur y Victoria zarpó de China el 8 de agosto de 1900. Al llegar a Tientsin, los australianos proporcionaron 300 hombres de una fuerza multinacional de 8.000 efectivos encargados de la captura de los fuertes chinos en Pei Tang, que dominó un ferrocarril clave. Llegaron demasiado tarde para tomar parte en la batalla, pero estaban involucrados en el ataque a la fortaleza de Pao-ting Fu, donde el gobierno chino se cree que han encontrado asilo después que Peking fue capturado por las fuerzas occidentales. Los victorianos se unió a una fuerza de 7.500 hombres en una marcha de diez días a la fortaleza, una vez más, sólo para encontrar que ya se había rendido. Los victorianos entonces guarnición de Tientsin y el contingente de Nueva Gales del Sur emprendió servicios de guarnición en Pekín. HMCS Protector was mostly used for survey, transport, and courier duties in the Gulf of Chihli, before departing in November.[51]
Las brigadas navales se mantuvo durante el invierno, por desgracia realizar tareas de vigilancia y protección, así como el trabajo como los ferroviarios y los bomberos. Se fueron de China en marzo de 1901, habiendo jugado sólo un papel menor en una ofensiva pocas expediciones de castigo y en la restauración del orden civil. Seis australianos murieron a causa de enfermedades y lesiones, pero no fueron asesinados como resultado de la acción bélica.[51]
Australian military forces at Federation, 1901
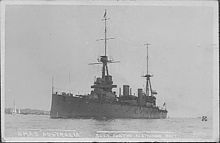 The battlecruiser HMAS Australia
The Commonwealth of Australia came into existence on 1 January 1901 as a result of the federation of the Australian colonies. Under the Constitution of Australia, defence responsibility was now vested in the new federal government. The co-ordination of Australia-wide defensive efforts in the face of imperial alemán interest in the Pacific Ocean fue una de las fuerzas impulsoras detrás del federalismo, y el Departamento de Defensa de inmediato pasó a existir como resultado de ello, mientras que el Australian Army y Commonwealth Naval Force También se establecieron rápidamente.[52]
El Ejército australiano entró en vigor el 1 de marzo de 1901 y todas las fuerzas coloniales, incluyendo aquellos que aún en el sur de África-se convirtió en parte de la nueva fuerza.[53] 28.923 soldados coloniales, entre ellos 1.457 soldados profesionales, 18.603 milicianos pagados y 8.863 voluntarios no remunerados, fueron trasladados posteriormente. Las unidades individuales sigue siendo administrado bajo las leyes coloniales varios hasta el ,Ley de Defensa de 1903 llevó todas las unidades en una sola pieza de legislación. Esta ley también impide la elevación de las unidades de infantería de pie y se especificó que las milicias no podían ser utilizados en conflictos laborales o de servicio fuera de Australia.[54] However, the majority of soldiers remained in militia units, known as the Citizen Military Forces (CMF). Major General Sir Edward Hutton—a former commander of the New South Wales Military Forces—subsequently became the first commander of the Commonwealth Forces on 26 December and set to work devising an integrated structure for the new army.[55] In 1911, following a report by Lord Kitchener the Royal Military College, Duntroon was established, as was a system of universal national service.[55]
Prior to federation each self-governing colony had operated its own naval force. These navies were small and lacked blue water capabilities, forcing the separate colonies to subsidise the cost of a British naval squadron in their waters for decades. The colonies maintained control over their respective navies until 1 March 1901, when the Commonwealth Naval Force was created. This new force also lacked blue water capable ships, and ultimately did not lead to a change in Australian naval policy. In 1909, Prime Minister Alfred Deakin, while attending the Imperial Conference in London, sought the British Government's agreement to end the subsidy system and develop an Australian navy. The Admiralty rejected these approaches, suggesting instead that a small fleet of destroyers and submarines would be sufficient. Deakin was unimpressed and had previously invited the American Great White Fleet to visit Australia in 1908. This visit had fired public enthusiasm for a modern navy and in part led to the order of two 700-ton River class destroyers. The surge in German naval construction prompted the Admiralty to change their position however and the Royal Australian Navy was subsequently formed in 1911, absorbing the Commonwealth Naval Force.[56] On 4 October 1913, the new fleet steamed through Sydney Heads, consisting of the battlecruiser HMAS Australia, three light cruisers, and three destroyers, while several other ships were still under construction. And as a consequence the navy entered the First World War as a formidable force.[57]
The Australian Flying Corps was established as part of the Army in 1912, and was later separated in 1921 to form the Royal Australian Air Force, making it the second oldest air force in the world.[58] Regardless, the service branches were not linked by a single chain of command however, and each reported to their own minister and had separate administrative arrangements and government departments.[59]
Primera Guerra Mundial, 1914–1918
Cuando Gran Bretaña declaró la guerra a Alemania en el inicio de la Primera Guerra Mundial, el gobierno australiano rápidamente siguieron el ejemplo, con el Primer Ministro Joseph Cook declarar el 5 de agosto de 1914 que "... cuando el imperio está en guerra, también lo es Australia"[60] y que refleja el sentimiento de muchos australianos que cualquier declaración de guerra de Gran Bretaña incluyen automáticamente Australia. Esto se debió en parte al gran número de ciudadanos de origen británico y la primera generación anglo-australianos que componían la población de Australia en el momento. De hecho al final de la guerra, casi el 20% de aquellos que sirvieron en las fuerzas australianas habían nacido en Gran Bretaña.[61]
Como las fuerzas de las milicias existentes fueron incapaces de servir en el extranjero conforme a las disposiciones de la Ley de Defensa de 1903, completamente voluntario, el cuerpo expedicionario conocido como el Australian Imperial Force (AIF) se formó y el reclutamiento comenzó el 10 de agosto de 1914. El gobierno se comprometió 20.000 hombres, organizados en una división de infantería and one light horse brigade plus supporting units. Reclutamiento y la organización se basa principalmente hacia las regiones y se llevó a cabo en los planes de movilización elaborado en 1912.[62] The first commander was General William Bridges, quien asumió el mando de la 1st Division.[63] A lo largo del curso de los esfuerzos de los conflictos de Australia se centra principalmente en la guerra terrestre, aunque las pequeñas fuerzas aéreas y navales también se comprometieron.
Ocupación de Nueva Guinea Alemana
Tras el estallido de la guerra las fuerzas australianas se movió rápidamente para reducir la amenaza que plantea para la navegación por la proximidad de las colonias de Alemania en el Pacífico. Una fuerza voluntaria de 2.000 hombres de fuerza independiente de la FIA, y que consiste en un batallón de infantería y 500 reservistas navales y ex-marineros conocida como la Australian Naval and Military Expeditionary Force (AN&MEF), se formó rápidamente bajo el mando del Coronel William Holmes. Los objetivos de la fuerza fueron las estaciones inalámbricas en Yap en el Islas Carolinas, Nauru y en Rabaul de Nueva Guinea alemana. La fuerza llegó a Rabaul el 11 de septiembre de 1914 y ocupó el día siguiente, sólo encontró resistencia breve de los defensores alemanes y nativos durante la lucha en Bita Paka y Toma. Nueva Guinea Alemana se rindió el 17 de septiembre de 1914. Las pérdidas de Australia fueron bajas incluyendo seis muertos durante los combates, pero se vieron agravados por la misteriosa pérdida del submarino AE1 con 35 hombres a bordo.[64]
Gallipoli
The AIF departed by ship in a single convoy from Albany on 1 November 1914. During the journey one the of the convoy's naval escorts—Plantilla:HMAS—engaged and destroyed the German cruiser Plantilla:SMS at the Battle of Cocos el 8 de noviembre, en la primer acción buque a buque que implicó a la Royal Australian Navy.[65] Although originally bound for England to undergo further training and then for employment on the Western Front, the Australians were subsequently sent to British-controlled Egypt in order to pre-empt any Turkish attack against the strategically important Suez Canal, and with a view to opening another front against the Central Powers.[66]
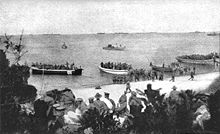
Con el objetivo de golpear a Turquía fuera de la guerra, los británicos decidieron entonces llevar a cabo un desembarco en Gallipoli, y tras un período de formación y reorganización de los australianos se incluyeron entre las fuerzas británicas, indias y francesas comprometidas con la campaña. El Cuerpo de Ejército de Australia y Nueva Zelanda combinado (ANZAC)—comandado por el general británico William Birdwood—posteriormente, llegaron a la península de Gallipoli, el 25 de abril de 1915. A pesar de la promesa de transformar la guerra en caso de éxito, el Campaña de Gallipoli fue mal concebido y, finalmente, duró ocho meses de estancamiento con sangre, sin lograr sus objetivos.[67] Australian casualties totalled 26,111, including 8,141 killed.[68]
Para los australianos y neozelandeses, la campaña de Gallípoli llegó a simbolizar un hito importante en la aparición de los dos países como actores independientes en el escenario mundial y el desarrollo de un sentido de identidad nacional.[69] Hoy en día, la fecha del desembarco inicial, 25 de abril, se conoce como Día de Anzac en Australia y Nueva Zelanda, y cada año miles de personas se reúnen en los memoriales de ambas naciones, y de hecho en Turquía, en honor a la valentía y el sacrificio del Anzacs original, y de todos aquellos que han perdido su vida en la guerra.[70] [71]
Egipto y Palestina
Después de la retirada de Gallipoli, los australianos volvieron a Egipto y la FIA se sometió a una importante expansión. En 1916 la infantería empezaron a trasladarse a Francia, mientras que las unidades de caballería se quedó en el Medio Oriente para luchar contra los turcos. Australian troops of the Anzac Mounted Division and the Australian Mounted Division saw action in all the major battles of the Sinai and Palestine Campaign, playing a pivotal role in fighting the Turkish troops that were threatening British control of Egypt.[72] The Australian’s first saw combat during the Senussi Uprising in the Libyan Desert and the Nile Valley, during which the combinded British forces successfully put down the primitive pro-Turkish Islamic sect with heavy casualties.[73] The Anzac Mounted Division subsequently saw considerable action in the Battle of Romani contra los turcos entre 3-5 agosto de 1916, con los turcos retirados.[74] Después de esta victoria de las fuerzas británicas lanzaron a la ofensiva en la península del Sinaí, aunque el ritmo de avance se regía por la rapidez con la que podría ser el ferrocarril y el acueducto construidos. Rafa fue capturado el 9 de enero de 1917, mientras que la última de las pequeñas guarniciones turcas en el Sinaí fueron eliminados en febrero. Horse were subsequently used to help put down a nationalist revolt in Egypt en 1919 y lo hizo con la eficiencia y la brutalidad, sufriendo un número de víctimas mortales en el proceso de.[75]
Mientras tanto, la Australian Flying Corps (AFC) había sido objeto de desarrollo notable, y su independencia como una fuerza nacional independiente era único entre los dominios. El despliegue de sólo una sola aeronave de Nueva Guinea alemana en 1914, el primero de operaciones de vuelo no se produjo hasta 27 de mayo 1915 sin embargo, cuando el Vuelo mitad de Mesopotamia fue llamado para ayudar en la protección de los intereses petroleros británicos en Iraq. La AFC se expandió pronto y cuatro escuadrones más tarde vio la acción en Egipto, Palestina y en el frente occidental, donde tuvieron un buen desempeño.[76]
Western Front
Five infantry divisions of the AIF saw action in France and Belgium, leaving Egypt in March 1916.[77] The I Anzac Corps subsequently took up positions in a quiet sector south of Armentieres on 7 April 1916 and for the next two and a half years the AIF participated in most of the major battles on the Western Front, earning a formidable reputation. Although spared from the disastrous first day of the Battle of the Somme, within weeks four Australian divisions had been committed.[78] The 5th Division, positioned on the left flank, was the first in action during the Battle of Fromelles on 19 July 1916, suffering 5,533 casualties in a single day. The 1st Division entered the line on 23 July, assaulting Pozieres, and by the time that they were relieved by the 2nd Division on 27 July, they had suffered 5,286 casualties.[79] Mouquet Farm was attacked in August, with casualties totalling 6,300 men.[80] By the time the AIF was withdrawn from the Somme to re-organise, they had suffered 23,000 casualties in just 45 days.[79]
In March 1917, the 2nd and 5th Divisions pursued the Germans back to the Hindenburg Line, capturing the town of Bapaume. On 11 April the 4th Division assaulted the Hindenburg Line in the disastrous First Battle of Bullecourt, losing over 3,000 casualties and 1,170 captured.[81] On 15 April the 1st and 2nd Divisions were counter-attacked near Lagnicourt and were forced to abandon the town, before recapturing it again.[82] The 2nd Division then took part in the Second Battle of Bullecourt, beginning on 3 May, and succeeded in taking sections of the Hindenburg Line and holding them until relieved by the 1st Division.[81] Finally on 7 May the 5th Division relieved the 1st, remaining in the line until the battle ended in mid-May. Combined these efforts cost 7,482 Australian casualties.[83]
On 7 June 1917, the II Anzac Corps—along with two British corps—launched an operation in Flanders in order to eliminate a salient south of Ypres.[84] The attack commenced with the detonation of a million pounds (454,545 kg) of explosives that had been placed underneath the Messines ridge, destroying the German trenches.[85] The advance was virtually unopposed, and despite strong German counterattacks the next day, it succeeded. Australian casualties during the Battle of Messines included nearly 6,800 men.[86] I Anzac Corps then took part in the Third Battle of Ypres in Belgium as part of the campaign to capture the Gheluvelt Plateau, between September and November 1917.[86] Individual actions took place at Menin Road, Polygon Wood, Broodseinde, Poelcappelle and Passchendaele and over the course of eight weeks fighting the Australians suffered 38,000 casualties.[87]
On 21 March 1918 the German Army launched its Spring Offensive in a last-ditched effort to win the war, unleashing sixty-three divisions over a 70 millas (112,65408 km) front.[88] As the Allies fell back the 3rd and 4th Divisions were rushed south to Amiens on the Somme.[89] The offensive lasted for the next five months and all five AIF divisions in France were engaged in the attempt to stem the tide. By late May the Germans had pushed to within 50 millas (80,4672 km) of Paris.[90] During this time the Australians fought at Dernacourt, Morlancourt, Villers-Bretonneux, Hangard Wood, Hazebrouck, and Hamel.[91] At Hamel the commander of the Australian Corps, Lieutenant General John Monash, successfully used combined arms—including aircraft, artillery and armour—in an attack for the first time.[92]
The German offensive ground to a halt in mid-July and a brief lull followed, during which the Australians undertook a series of raids, known as Peaceful Penetrations.[93] The Allies soon launched their own offensive—the Hundred Days Offensive—ultimately ending the war. Beginning on 8 August 1918 the offensive included four Australian divisions striking at Amiens.[94] Utilizando las técnicas desarrolladas a principios de armas combinadas en Hamel, aumentos significativos se realizaron en lo que se conoce como el "Día Negro" del Ejército alemán.[95] The offensive continued for four months, and during Second Battle of the Somme el Cuerpo de Australia luchó acciones en Lihons, Etinehem, Proyart, Chuignes, y Mont St Quentin, antes de su compromiso final de la guerra el 5 de octubre de 1918 en Montbrehain.[96] La FIA fue posteriormente fuera de la línea cuando el armisticio se declaró el 11 de noviembre de 1918.
En total, 416.806 australianos fueron reclutados durante la guerra y sirvieron en el extranjero unos 333.000. 61.508 murieron y otros 155.000 resultaron heridos (una tasa total de bajas del 65).[34] The financial cost to the Australian government was calculated at £376,993,052.[97] Two referendums on conscription para el servicio en el extranjero había sido derrotado durante la guerra, la preservación del status de voluntario de la fuerza australiana, pero se extiende la reserva de mano de obra disponible, sobre todo hacia el final de los combates. En consecuencia, Australia sigue siendo uno de los dos ejércitos en ambos lados de no recurrir a la conscripción durante la guerra.[62] [note 2]
La guerra tuvo un efecto profundo en la sociedad australiana de otras maneras también. De hecho, para muchos australianos la participación de la nación es vista como un símbolo de su aparición como actor internacional, mientras que muchas de las nociones de carácter y nacionalidad australiana que existen en la actualidad tienen su origen en la guerra. 64 australianos fueron galardonados con el Cruz de la Victoria durante la Primera Guerra Mundial.[50]
Inter-war years
Russian Civil War, 1918–1919
The Russian Civil War began after the Russian provisional government collapsed and the Bolshevik party assumed power in October 1917. Following the end of the First World War, the western powers—including Britain—intervened, giving half-hearted support to the pro-tsarist, anti-Bolshevik White Russian forces. Although the Australian government refused to commit forces, many Australians serving with the British Army became involved in the fighting. A small number served as advisors to White Russian units with the North Russian Expeditionary Force (NREF). Awaiting repatriation in England, about 150 Australians subsequently enlisted in the British North Russia Relief Force (NRRF), where they were involved in a number of sharp battles and several were killed.[75]
The Royal Australian Navy destroyer Black Sea in late 1918. Other Australians served as advisers with the British Military Mission to the White Russian General, Anton Denikin in South Russia, while several more advised Admiral Aleksandr Kolchak in Siberia.[98] Later, they also served in Mesopotamia as part of Dunsterforce and the Malleson Mission, although these missions were aimed at preventing Turkish access to the Middle East and India, and did little fighting.[99]
Aunque las motivaciones de los australianos que se ofrecieron como voluntarios para luchar en Rusia sólo puede adivinarse, parece improbable que haya sido política.[99] Regardless, they confirmed a reputation for audacity and courage, winning the only two Victoria Crosses of the land campaign, despite their small numbers.[75] Yet Australian involvement was barely noticed at home at the time and made little difference to the outcome of the war.[100] El total de bajas incluye 10 muertos y 40 heridos, la mayoría de las muertes por enfermedad, durante las operaciones en Mesopotamia.[101]
Spanish Civil War, 1936–1939
A small number of Australian volunteers fought on both sides of the Spanish Civil War, although they predominantly supported the Spanish Republic through the International Brigades. The Australians were subsequently allocated to the battalions of other nationalities, rather than forming their own units. Most were radicals motivated by ideological reasons, while a number were Spanish-born migrants who returned to fight in their country of origin. At least 66 Australians volunteered, with only one—Nugent Bull, a conservative catholic who was later killed serving in the RAF during the Second World War—known to have fought for General Franco's Nationalist forces.[102]
While a celebrated cause for the Australian left— particularly the Communist Party of Australia and the trade union movement—the war failed to spark particular public interest and the government maintained its neutrality.[103] Australian opposition to the Republican cause was marshalled by B.A. Santamaria on an anti-communist basis, rather than a pro-Nationalist basis. Equally, although individual right wing Australians may have served with the Nationalist rebels, they received no public support. Service in a foreign armed force was illegal at the time, however as the government received no reports of Australians travelling to Spain to enlist, no action was taken.[102] [note 3] Consequently returned veterans were neither recognised by the government or the RSL. Although the number of Australian volunteers was relatively small compared to those from other countries, at least 14 were killed.[104]
Second World War, 1939–1945
Europe and the Middle East
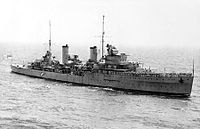 The light cruiser HMAS Sydney in 1940.
Australia entered the Second World War on 3 September 1939. At this time the Australian military was small and unready for war.[105] Recruiting for a Second Australian Imperial Force (2AIF) began in mid-September. While there was no rush of volunteers like the First World War, a high proportion of Australian men of military age had enlisted by mid-1940. Four infantry divisions were formed during 1939 and 1940, three of which were dispatched to the Middle East.[106] The RAAF's resources were initially mainly devoted to training airmen for service with the Commonwealth air forces through the Empire Air Training Scheme (EATS), through which almost 28,000 Australians were trained during the war.[107]
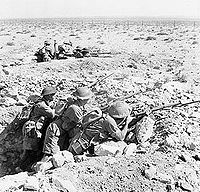
The Australian military's first major engagements of the war were against Italian forces in the Mediterranean and North Africa. During 1940 the light cruiser HMAS Sydney and five elderly destroyers (dubbed the 'Scrap Iron Flotilla' by Nazi Propaganda Minister Joseph Goebbels—a title proudly accepted by the ships) took part in a series of operations as part of the British Mediterranean Fleet, and sank several Italian warships.[108] The Army first saw action in January 1941, when the 6th Division formed part of the Commonwealth forces during Operation Compass. The division assaulted and captured Bardia on 5 January and Tobruk on 22 January, with tens of thousands of Italian troops surrendering at both towns.[109] The 6th Division took part in the pursuit of the Italian Army and captured Benghazi on 4 February. In late February it was withdrawn for service in Greece, and was replaced by the 9th Division.[110]
The Australian forces in the Mediterranean endured a number of campaigns during 1941. During April, the 6th Division, other elements of I Corps and several Australian warships formed part of the Allied force which unsuccessfully attempted to defend Greece from German invasion during the Battle of Greece. At the end of this campaign, the 6th Division was evacuated to Egypt and Crete.[111] The force at Crete subsequently fought in the Battle of Crete during May, which also ended in defeat for the Allies. Over 5,000 Australians were captured in these campaigns, and the 6th Division required a long period of rebuilding before it was again ready for combat.[112] The Germans and Italians also went on the offensive in North Africa at the end of March and drove the Commonwealth force there back to near the border with Egypt. The 9th Division and a brigade of the 7th Division were besieged at Tobruk; successfully defending the key port town until they were replaced by British units in October.[113] During June, the main body of the 7th Division, a brigade of the 6th Division and the I Corps headquarters took part in the Syria-Lebanon Campaign against the Vichy French. Resistance was stronger than expected; Australians were involved in most of the fighting and sustained most of the casualties before the French capitulated in early July.[114]
The majority of Australian units in the Mediterranean returned to Australia in early 1942, after the outbreak of the Pacific War. The 9th Division was the largest unit to remain in the Middle East, and played a key role in the First Battle of El Alamein during June and the Second Battle of El Alamein in October.[115] The division returned to Australia in early 1943, but several RAAF squadrons and RAN warships took part in the subsequent Tunisia Campaign and the Italian Campaign from 1943 until the end of the war.
The RAAF's role in the strategic air offensive in Europe formed Australia's main contribution to the defeat of Germany. Approximately 13,000 Australian airmen served in dozens of British and five Australian squadrons in RAF Bomber Command between 1940 and the end of the war.[116] Australians took part in all of Bomber Command's major offensives and suffered heavy losses during raids on German cities and targets in France.[117] Australian aircrew in Bomber Command had one of the highest casualty rates of any part of the Australian military during the Second World War and sustained almost 20 percent of all Australian deaths in combat; 3,486 were killed and hundreds more were taken prisoner.[118] Australian airmen in light bomber and fighter squadrons also participated in the liberation of Western Europe during 1944 and 1945[119] and two RAAF maritime patrol squadrons served in the Battle of the Atlantic.
Asia and the Pacific
From the 1920s Australia's defence thinking was dominated by the so-called 'Singapore strategy'. This strategy involved the construction and defence of a major naval base at Singapore from which a large British fleet would respond to Japanese aggression in the region. To this end, a high proportion of Australian forces in Asia were concentrated in Malaya during 1940 and 1941 as the threat from Japan increased.[120] However as a result of the emphasis on cooperation with Britain, relatively few Australian military units had been retained in Australia and the Asia-Pacific region. Measures were taken to improve Australia's defences as war with Japan loomed in 1941, but these proved inadequate. In December 1941, the Australian Army in the Pacific comprised the 8th Division, most of which was stationed in Malaya, and eight partially trained and equipped divisions in Australia. The RAAF was equipped with 373 aircraft, most of which were obsolete trainers, and the RAN had three cruisers and two destroyers in Australian waters.[121]
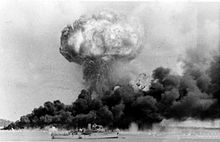
The Australian military suffered a series of defeats during the early months of the Pacific War. The 8th Division and RAAF squadrons in Malaya formed a key part of the Commonwealth forces which were unable to stop a smaller Japanese invasion force which landed on 7 December. The Commonwealth force withdrew to Singapore at the end of January, but was forced to surrender on 15 February after the Japanese captured much of the island.[122] Smaller Australian forces were also defeated during early 1942 in the Battle of Rabaul, Battle of Ambon, Battle of Timor, and Battle of Java.[123] The Australian town of Darwin was heavily bombed by the Japanese on 19 February, to prevent it from being used as an Allied base.[124] Over 22,000 Australians were taken prisoner in early 1942 and endured harsh conditions in Japanese captivity. The prisoners were subjected to malnutrition, denied medical treatment and frequently beaten and killed by their guards. As a result, 8,296 Australian prisoners died in captivity.[125]
The rapid Allied defeat in the Pacific caused many Australians to fear that the Japanese would invade the Australian mainland. While elements of the Imperial Japanese Navy proposed this in early 1942, it was judged to be impossible by the Japanese Imperial General Headquarters, which instead adopted a strategy of isolating Australia from the United States by capturing New Guinea, the Solomon Islands, Fiji, Samoa, and New Caledonia.[126] This fact was not known by the Allies at the time, and the Australian military was greatly expanded to meet the threat of invasion. Large numbers of United States Army and Army Air Forces units arrived in Australia in early 1942, and the Australian military was placed under the overall command of General Douglas MacArthur in March.[127]
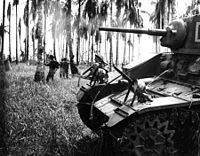
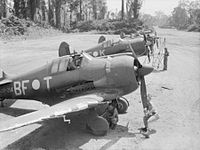
Australians played a central role in the New Guinea campaign during 1942 and 1943. After an attempt to land troops at Port Moresby was defeated in the Battle of the Coral Sea, the Japanese attempted to capture the strategically important town by advancing overland across the Owen Stanley Ranges and Milne Bay. Australian Army units defeated these offensives in the Kokoda Track campaign and Battle of Milne Bay with the support of the RAAF and USAAF.[128] Australian and US Army units subsequently assaulted and captured the Japanese bases on the north coast of Papua in the hard-fought Battle of Buna-Gona.[129] The Australian Army also defeated a Japanese attempt to capture the town of Wau in January 1943 and went onto the offensive in the Salamaua-Lae campaign in April. In late 1943, the 7th and 9th Divisions played an important role in Operation Cartwheel, when they landed to the east and west of Lae and secured the Huon Peninsula during the Huon Peninsula campaign and Finisterre Range campaign.[130]
The Australian mainland came under attack during 1942 and 1943. Japanese submarines operated off Australia from May to August 1942 and January to June 1943. These attacks sought to cut the Allied supply lines between Australia and the US and Australia and New Guinea, but were unsuccessful.[131] Japanese aircraft also conducted air raids against Allied bases in northern Australia which were being used to mount the North Western Area Campaign against Japanese positions in the Netherlands East Indies (NEI).[132]
Australia's role in the Pacific War declined from 1944. The increasing size of the US forces in the Pacific rendered the Australian military superfluous and labour shortages forced the Government to reduce the size of the armed forces in order to boost war production.[133] Nevertheless, the Government wanted the Australian military to remain active, and agreed to MacArthur's proposals that it be used in relatively unimportant campaigns. In late 1944, Australian troops and RAAF squadrons replaced US garrisons in eastern New Guinea, New Britain, and Bougainville, and launched offensives aimed at destroying or containing the remaining Japanese forces there. In May 1945, I Corps, the Australian First Tactical Air Force and USAAF and USN units began the Borneo Campaign, which continued until the end of the war. These campaigns contributed little to Japan's defeat and remain controversial.[134]
Following Japan's surrender on 15 August 1945 Australia assumed responsibility for occupying much of Borneo and the eastern Netherlands East Indies until British and Dutch colonial rule was restored. Australian authorities also conducted a number of war crimes trials of Japanese personnel. 993,000 Australians enlisted during the war, while 557,000 served overseas. Casualties included 39,767 killed and another 66,553 were wounded.[34] [note 4] 20 Victoria Crosses were awarded to Australians.[50]
Cold War
Guerra de Corea, 1950–1953
El 25 de junio de 1950, el Ejército de Corea del Norte (KPA) cruzó la frontera con Corea del Sur y avanzadas para la capital Seúl, que cayó en menos de una semana. Las fuerzas de Corea del Norte continuó hacia el puerto de Pusan y dos días después de los Estados Unidos ofreció su ayuda a Corea del Sur. En respuesta, el Consejo de Seguridad pidió a los miembros que ayudaran a repeler el ataque norcoreano. En un principio, Australia contribuyó con cazabombarderos P-51 Mustang del No. 77 Squadron RAAF and infantry from the 3rd Battalion, Royal Australian Regiment (3 RAR), both of which were stationed in Japan as part of the British Commonwealth Occupation Force (BCOF). In addition it provided the majority of supply and support personnel to the British Commonwealth Forces Korea. The RAN frigate Inchon landings. As a part of the invasion force under the UN Supreme Commander, General Douglas MacArthur, the battalion moved north and was involved in its first major action at Battle of Yongju near Pyongyang on 22 October, before advancing towards the Yalu River.[136] Further successful actions followed at Kujin on 25–26 October 1950 and at Chongju on 29 October 1950.[137] North Korean casualties were heavy, while Australian losses included their commanding officer, Lieutenant Colonel Charles Green, who was wounded in the stomach by artillery fire after the battle and succumbed to his wounds and died two days later on 1 November.[138] Meanwhile, during the last weeks of October the Chinese had moved 18 divisions of the People's Volunteer Army across the Yalu River in order to reinforce the remnants of the KPA. Undetected by US and South Korean intelligence, the 13th Army Group crossed the border on 16 October and penetrated up to 100 kilómetros (62,1371192 mi) into North Korea, and were reinforced in early November by 12 divisions from the 9th Army Group; in total 30 divisions composed of 380,000 men.[139] 3 RAR fought its first action against the Chinese at Pakchon on 5 November.[140] The fighting cost the battalion heavily and despite halting a Chinese division the new battalion commander was dismissed in the wake.[141] Following the Chinese intervention, the UN forces were defeated in successive battles and 3 RAR was forced to withdraw to the 38th parallel.[135]
A series of battles followed at Uijeongbu on 1–4 January 1951, as the British and Australians occupied defensive positions in an attempt to secure the northern approaches to the South Korean capital.[140] Further fighting occurred at Chuam-ni on 14–17 February 1951 following a another Chinese advance, and later at Maehwa-San between 7–12 March 1951 as the UN resumed the offensive.[142] Australian troops subsequently participated in two more major battles in 1951, with the first taking place during fighting which later became known as the Battle of Kapyong. On 22 April, Chinese forces attacked the Kapyong valley and forced the South Korean defenders to withdraw. Las tropas australianas y canadienses recibieron la orden de detener este avance chino. Después de una noche de la lucha contra los australianos recuperaron sus posiciones, a costa de 32 hombres muertos y heridos 59.[143] In July 1951, the Australian battalion became part of the combined Canadian, British, Australian, New Zealand, and Indian 1st Commonwealth Division. The second major battle took place during Operation Commando and occurred after the Chinese attacked a salient in a bend of the Imjin River. The 1st Commonwealth Division counter-attacked on 3 October, capturing a number of objectives including Hill 355 and Hill 317 during the Battle of Maryang San; after five days the Chinese retreated. Australian casualties included 20 dead and 104 wounded.[144]
Los beligerantes se quedaron atrapados en la guerra de trincheras similar a la Primera Guerra Mundial, en la que los hombres vivían en los túneles, reductos y fuertes sacos de arena detrás de las defensas de alambre de púas. Desde 1951 hasta el final de la guerra, 3 RAR colocaron trincheras en el lado oriental de las posiciones de la división en las colinas al noreste del río Imjin. Frente a ellos estaban posiciones chinas fuertemente fortificadas. En marzo de 1952, Australia aumentó su compromiso de tierra a dos batallones, sending 1 RAR. This battalion remained in Korea for 12 months, before being replaced by 2 RAR in April 1953.[145] The Australians fought their last battle during 24–26 July 1953, with 2 RAR holding off a concerted Chinese attack along the Samichon River and inflicting significant casualties for the loss of five killed and 24 wounded.[146] Hostilities were suspended on 27 July 1953. 17,808 Australians served during the war, with 341 killed, 1,216 wounded and 30 captured.[147]Malayan Emergency, 1950–1960
The Malayan Emergency was declared on 18 June 1948, after three estate managers were murdered by members of the Malayan Communist Party (MCP).[148] Australian involvement began in June 1950, when in response to a British request, six Lincolns from No. 1 Squadron and a flight of Dakotas from No. 38 Squadron arrived in Singapore to form part of the British Commonwealth Far East Air Force (FEAF). The Dakotas were subsequently used on cargo runs, troop movement, as well as paratroop and leaflet drops, while the Lincoln bombers carried out bombing raids against the Communist Terrorist (CT) jungle bases.[149] The RAAF were particularly successful, and in one such mission known as Operation Termite, five Lincoln bombers destroyed 181 communist camps, killed 13 communists and forced one into surrender, in a joint operation with the RAF and ground troops.[149]
Australian ground forces were deployed to Malaya in October 1955 as part of the Far East Strategic Reserve. In January 1956, the first Australian ground forces were deployed on Malaysian peninsula, consisting of the 2nd Battalion, Royal Australian Regiment (2 RAR). 2 RAR mainly participated in "mopping up" operations over the next 20 months, conducting extensive patrolling in and near the CT jungle bases, as part of 28th British Commonwealth Brigade. Contact with the enemy was infrequent and results small, achieving relatively few kills. 2 RAR left Malaysia October 1957 to be replaced by 3 RAR. 3 RAR underwent six weeks of jungle training and began driving MCP insurgents back into the jungle of Perak and Kedah. The new battalion extensively patrolled and was involved in food denial operations and ambushes. Again contact was limited, although 3 RAR had more success than its predecessor. By late 1959, operations against the MCP were in their final phase, and most communists had been pushed back and across the Thailand border. 3 RAR left Malaysia October 1959 and was replaced by 1 RAR. Though patrolling the border 1 RAR did not make contact with the insurgents, and in October 1960 it was replaced by 2 RAR, which stayed in Malaysia until August 1963. The Malayan Emergency officially ended on 31 July 1960.[149]
Australia also provided artillery and engineer support, along with an air-field construction squadron. The Royal Australian Navy also served in Malayan waters, firing on suspected communist positions between 1956 and 1957. The Emergency was the longest continued commitment in Australian military history; 7,000[34] Australians served and 51 died in Malaya—although only 15 were on operations—and another 27 were wounded.[149]
At the start of the 1960s, Prime Minister Robert Menzies greatly expanded the Australian military so that it could carry out the Government's policy of Forward Defence in South East Asia. En 1964, Menzies anunció un gran aumento en los gastos de defensa. La fuerza del ejército australiano se incrementó en un 50% en tres años de 22.000 a 33.000, el suministro de una división total de tres brigadas con nueve batallones. La RAAF y RAN también se incrementarián a un 25%. In 1964, conscription or National Service was re-introduced, under the National Service Act (1964), for selected 20-year-olds based on date of birth, for a period of two years’ continuous full-time service.[150]
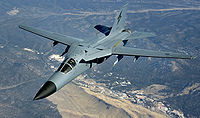
In 1961, three Q class destroyers. Traditionally, the RAN had purchased designs based on those of the Royal Navy and the purchase of American destroyers was significant. Wessex helicopters, and the purchase of six Mirage fighters in 1967, equipping No. 3, No. 75 and No. 77 Squadrons with them. The service also received American F-111 strike aircraft, C-130 Hercules transports, Orion maritime reconnaissance aircraft and Italian Macchi trainers.[152]
Indonesia-Malaysia Confrontation, 1962–1966
The Indonesia-Malaysia confrontation was fought from 1962 to 1966 between the British Commonwealth and Indonesia over the creation of the Federation of Malaysia, with the Commonwealth attempting to safeguard the security of the new state. The war remained limited, and was fought primarily on the island of Borneo, although a number of Indonesian seaborne and airborne incursions onto the Malay Peninsula did occur.[153] As part of Australia's continuing military commitment to the security of Malaysia, army, naval and airforce units were based there as part of the Far East Strategic Reserve. Regardless the Australian government was wary of involvement in a war with Indonesia and initially limited it’s involvement to the defence of the Malayan peninsula only. On two occasions Australian troops from 3 RAR were used to help mop up infiltrators from seaborne and airborne incursions at Labis and Pontian, in September and October 1964.[153]
A raíz de estos ataques el gobierno concedió a las peticiones de Gran Bretaña y Malasia para desplegar un batallón de infantería de Borneo. Durante las primeras fases, las tropas británicas de Malasia y había intentado sólo para controlar la frontera con Malasia / Indonesia, y para proteger los centros de población. Sin embargo, en el momento en el batallón australiano desplegado, los británicos decidieron en una acción más agresiva, que cruzan las fronteras para obtener información y obligando a las fuerzas indonesias a permanecer a la defensiva, bajo el código Operation Claret. Los combates tuvieron lugar en la selvática montaña del terreno y un clima debilitantes, con operaciones caracterizadas por el uso extensivo de las bases de la compañía ubicados a lo largo de la frontera, las operaciones transfronterizas, la utilización de helicópteros para el movimiento de tropas y de reabastecimiento, y el papel de human and signals intelligence to determine enemy movements and intentions.[154]
3 RAR deployed to Borneo in March 1965, and served in Sarawak until the end of July, operating on both sides of the border. The battalion had four major contacts with Indonesian forces and many smaller ones—including at Sungei Koemba, Kindau and Babang—as well as suffering casualties in two mine incidents. 4 RAR served a less-eventful tour between April and August 1966, and also operated over the border, clashing with the Indonesians on a number of occasions.[154] A squadron of the Special Air Service Regiment (SASR) was also deployed in 1965 and again in 1966, taking part in cross-border operations and inflicting significant casualties on the Indonesians, even though they were often tasked with covert reconnaissance.[155] Other units included artillery and engineers, while a number of RAN ships were involved in shelling Indonesian positions in Borneo and in repelling infiltrators in the Singapore Strait.[154] The RAAF played a relatively minor role, although it would have been used far more extensively had the war escalated.[156] [note 5]
Operations in Borneo were extremely sensitive and they received little press coverage in Australia, while official acknowledgement of involvement in cross-border missions only occurred in 1996. Following a military coup in Indonesia in early 1966 which brought General Suharto to power, a peace treaty was signed in August 1966 which ended the conflict.[154] 3,500 Australians served during Confrontation; casualties included 16 dead, with seven killed in action and eight wounded.[154]
Vietnam War, 1962–1973
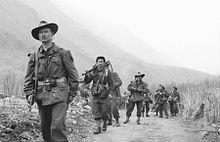
Archivo:7 RAR Vietnam (AWM EKN-67-0130-VN).jpgAn iconic image of Australian soldiers from 7 RAR waiting to be picked up by UH-1 Iroquois helicopters following a routine cordon and search operation.Australia's involvement in the Vietnam War was driven largely by the rise of communism in Southeast Asia after the Second World War, and the fear of its spread which developed in Australia during the 1950s and early 1960s.[157] As a consequence, Australia supported South Vietnam throughout the early 1960s. In 1961 and 1962, the leader of the South Vietnamese government, Ngo Dinh Diem, asked for assistance from the US and its allies in response to a growing insurgency supported by communist North Vietnam. Australia offered 30 military advisors from the Australian Army Training Team Vietnam, which became known simply as "The Team". They arrived in July and August 1962, beginning Australia's involvement in the war. Later in August 1964, the RAAF sent a flight of Caribou transport aircraft to the port city of Vung Tau.[158]
However with the security situation in South Vietnam continuing to deteriorate, the US increased its involvement to 200,000 combat troops by early 1965. Australia also committed ground forces, dispatching the 1st Battalion, Royal Australian Regiment (1 RAR) to serve with the US 173rd Airborne Brigade in Bien Hoa province in June 1965 and it subsequently fought a number of significant actions including at Gang Toi, Ho Bo Woods and Suoi Bong Trang.[158] In March 1966, the Australian government announced the deployment of a brigade-sized unit—the 1st Australian Task Force—to replace 1 RAR. Included were a large number of conscripts, under the increasingly controversial National Service scheme. Consisting of two infantry battalions as well as armour, aviation, artillery and other support arms, the task force was assigned primary responsibility for its own area and was based at Nui Dat, in Phuoc Tuy Province. Included were the Iroquois helicopters of No. 9 Squadron RAAF. At the Battle of Long Tan on 18 August 1966, D Company, 6 RAR with considerable artillery support held off and defeated a Viet Cong force that was at least six times bigger than itself. 18 Australians were killed and 24 wounded, while 245 communist dead were later recovered from the battlefield.[159]
With the Phuoc Tuy province coming progressively under control throughout 1967, the Australians increasingly spent a significant period of time conducting operations further afield.[160] 1ATF was subsequently deployed astride infiltration routes leading to Saigon in order to interdict communist movement against the capital as part of Operation Coburg during the 1968 Tet Offensive and later during the Battle of Coral-Balmoral in May and June 1968. At Fire Support Bases Coral and Balmoral the Australians had clashed with regular North Vietnamese Army and Viet Cong main force units operating in battalion and regimental strength for the first time in near conventional warfare, ultimately fighting their largest, most hazardous and most sustained battle of the war. During 26 days of fighting Australian casaulties included 25 killed and 99 wounded, while communist casualties included 267 killed confirmed by body count, 60 possibly killed, 7 wounded and 11 captured.[161] Other significant Australian actions included Binh Ba in June 1969, Hat Dich in late-December 1968 and early 1969 and Long Khanh in June 1971. At the height of the Australian commitment, 1 ATF numbered 8,500 troops, including three infantry battalions, armour, artillery, engineers, logistics and aviation units in support. A third RAAF unit, No. 2 Squadron RAAF, flying Canberra bombers, was sent in 1967, and four RAN destroyers joined US patrols in the waters off North Vietnam.[162]
The Australian withdrawal effectively commenced in November 1970. As a consequence of the overall allied strategy of Vietnamization and with the Australian government keen to reduce its own commitment to the war, 8RAR was not replaced at the end of its tour of duty. 1ATF was again reduced to just two infantry battalions, albeit with significant armour, artillery and aviation support remaining.[163] Australian combat forces were further reduced during 1971 as part of a phased withdrawal, and 1ATF ceased operations in October. Meanwhile the advisors remained to train South Vietnamese troops until withdrawn on 18 December 1972 by the newly elected Labor government of Gough Whitlam.[164] The last Australian forces were finally withdrawn in 1973. The Vietnam War was Australia's longest and most controversial war and although initially enjoying broad support, as its military involvement increased a vocal anti-war movement developed.[165] More than 50,000 Australians served in Vietnam; 519 were killed and 2,398 were wounded. Four were awarded the Victoria Cross.[162]
Post-Vietnam era
Creation of the Australian Defence Force, 1976
Although the importance of 'joint' warfare had been highlighted during Second World War when Australian naval, ground and air units frequently served as part of single commands, the absence of a central authority continued to result in poor coordination between the services in the post-war era, with each organising and operating on the basis of a different military doctrine.[166] The need for an integrated command structured received more emphasis during the Australian military's experiences in the Vietnam War.[166] In 1973, the Secretary of the Department of Defence, Arthur Tange, submitted a report to the Government that recommended the unification of the separate departments supporting each service into a single department and the creation of the post of Chief of the Defence Force Staff.[167]
The Whitlam Labor Government subsequently amalgamated the five defence ministries (Defence, Navy, Army, Air Force, and Supply) into a single Department of Defence in 1973, while conscription under the National Service scheme was abolished.[167] On 1 January 1976, the three branches of the Australian military were brought together as a unified, all-volunteer, professional force known as the Australian Defence Force (ADF).[168] Today, the ADF is headquartered at Russell Offices in Canberra and is divided into Air, Land, Maritime and Special Operations Commands. In addition, Northern Command is based in Darwin, and is responsible for operations in Northern Australia.[169]
Defence of Australia, 1980s and 1990s
Until the 1970s, Australia's military strategy centred on the concept of Forward Defence, in which the role of the Australian military was to cooperate with Allied forces to counter threats in Australia's region. In 1969, when the United States began the Guam Doctrine and the British withdrew 'east of Suez', Australia developed a defence policy emphasising self-reliance of the Australian continent. This policy was known as the Defence of Australia Policy, under which the focus of Australian defence planning was to protect the nation's northern maritime approaches (the 'air-sea gap') against possible attack.[170]
In line with this goal, the ADF was restructured to increase its ability to strike at enemy forces from Australian bases and to counter raids on continental Australia. The ADF achieved this by increasing the capabilities of the RAN and RAAF and relocating regular Army units to Northern Australia.[171] During this time the ADF had no military units on operational deployment outside Australia. However in 1987 the ADF made its first operational deployment as part of Operation Morris Dance, in which several warships and a rifle company deployed to the waters off Fiji in response to the 1987 Fijian coups d'état. While broadly successful, this deployment highlighted the need for the ADF to improve its capability to rapidly respond to unforeseen events.[172]
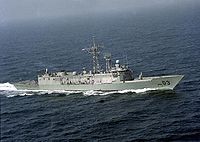 editar] Gulf War, 1991
Australia was a member of the international coalition which contributed military forces to the 1991 Gulf War, deploying a naval task group of two warships, a support ship and a clearance diving team; in total about 750 personnel. The Australian contribution was the first time Australian personnel were deployed to an active war zone since the establishment of the ADF and the deployment tested the it's capabilities and command structure. However the Australian force did not see combat, and instead playing a significant role in enforcing the sanctions put in place against Iraq following the invasion of Kuwait. Some ADF personnel serving on exchange with British and American units did see combat, and a few were later decorated for their actions.[173] Following the war, the Navy regularly deployed a frigate to the Persian Gulf or Red Sea to enforce the trade sanctions which continued to be applied to Iraq.[174]
Global security, late-1990s
Since the late 1980s, the Australian government had increasingly called upon the ADF to contribute forces to peacekeeping missions around the world. While most of these deployments involved only small numbers of specialists, several led to the deployment of hundreds of personnel. Large peacekeeping deployments were made to Namibia in early 1989, Cambodia between 1992 and 1993, Somalia in 1993, Rwanda between 1994 and 1995 and Bougainville in 1994 and from 1997 onwards.[175] The 1996 election of the Howard Liberal government resulted in significant reforms to the ADF's force structure and role, with the new government's defence strategy placed less singular emphasis on defending Australia from direct attack and greater emphasis on working in cooperation with regional states and Australia's allies to manage potential security threats in recognition of Australia's global security interests. In line with this new focus, the ADF's force structure changed in an attempt to increase the proportion of combat units to support units and to improve the ADF's combat effectiveness.[176]
New Millennium
East Timor, 1999–present
Archivo:6RAR at Same March 2007 low res.JPGAustralian soldier in Same, East Timor, 6 March 2007.The former-Portuguese colony of East Timor was invaded by Indonesia in 1975, however, following years of violent struggle the new Indonesian government of President B.J. Habibie subsequently agreed to allow the East Timorese to vote on autonomy in 1999. The United Nations Mission in East Timor (UNAMET) was established to organise and conduct the vote, which was held at the end of August 1999 and resulted with 78.5% of voters deciding in favour of independence. However, following the announcement of the results pro-Indonesian militias supported by elements of the Indonesian military, launched a campaign of violence, looting and arson and many East Timorese were killed, while perhaps more than 500,000 were displaced. Unable to control the violence, Indonesia subsequently agreed to the deployment of a multinational peacekeeping force. Australia, which had contributed police to UNAMET, organised and led an international military coaltion, known as the International Force for East Timor (INTERFET), a non-UN force operating in accordance with UN resolutions. Total Australian forces committed included 5,500 personnel.[177]
Under the overall command of Australian Major General Peter Cosgrove, INTERFET began arriving on 12 September 1999 and was tasked with restoring peace and security, protecting and supporting UNAMET, and facilitating humanitarian assistance operations. With the withdrawal of the Indonesian armed forces, police and government officials from East Timor, UNAMET re-established its headquarters in Dili on 28 September.[177] On 19 October 1999, Indonesia formally recognised the result of the referendum and shortly thereafter a UN peacekeeping force, the United Nations Transitional Administration in East Timor (UNTAET) was established, becoming fully responsible for the administration of East Timor during its transition to independence. The hand-over of command of military operations from INTERFET to UNTAET was completed on 28 February 2000. Australia continued to support the UN peacekeeping operation with between 1,500 and 2,000 personnel, as well as landing craft and Blackhawk helicopters and remained the largest contributor of personnel to the peacekeeping mission.[177] During these operations Australian forces regularly clashed with pro-Indonesian militia and on a number of occasions Indonesian forces as well, especially along the border with West Timor. Significant actions occurred in Suai, Mota'ain and at Aidabasalala in October 1999. However with the security situation stabilised the bulk of the Australian and UN forces were withdrawn by 2005. Two Australians died from non-battle related causes, while a number of Australians were wounded in action.[34]
The unexpected deployment to East Timor in 1999 led to significant changes in Australian defence policy and to an enhancement of the ADF's ability to conduct operations outside Australia. This successful deployment was the first time a large Australian military force had operated outside of Australia since the Vietnam War and revealed shortcomings in the ADF's ability to mount and sustain such operations.[178] In response, the 2000 Defence White Paper placed a greater emphasis on preparing the ADF for overseas deployments. The Australian government committed to improve the ADF's capabilities by improving the readiness and equipment of ADF units, expanding the ADF to 57,000 full-time personnel and increasing real Defence expenditure by 3% per year.[179]
In May 2006, 2,000 ADF personnel were again deployed to East Timor as part of Operation Astute, following unrest between elements of the Timor Leste Defence Force. Australian forces were involved in a number skirmishes during this time, including a heavy clash with rebels commanded by Alfredo Reinado at Same on 4 March 2007. However, by early-2010 the security situation has been stabilised and just 400 Australian personnel remain to train the local security forces as part of a small international force.[180]
Afghanistan, 2001–present
Shortly after the Islamist inspired terrorist attacks in New York and Washington on 11 September 2001, Australian forces were committed to the American-led international coalition against terrorism. The ADF's most visible contribution—codenamed Operation Slipper—has been a special forces task group operating in Afghanistan from 2001 to 2002 and again from mid-2005 to fight against the Taliban. Over time the Australian commitment has grown, with the addition of further ground forces from 2006 to provide security, reconstruction and to mentor and train the Afghan National Army. Australia has also contributed a frigate and two AP-3 Orion surveillance aircraft and three C-130 Hercules transport aircraft to international operations in the Persian Gulf and Indian Ocean since 2001, supporting both the operations in Afghanistan and those in Iraq under Operation Catalyst. A detachment of four F/A-18 Hornet fighter-bombers was based at Diego Garcia from late-2001 to mid-2002, while two Boeing 707 air-to-air refuelling aircraft were also based in Manas Air Base in Kyrgyzstan to provide support to coalition aircraft operating in Afghan airspace but have since been withdrawn.[181]
As of 2011 a modest Australian force numbering 1,550 personnel remains in Afghanistan where they are involved in counter-insurgency operations in Uruzgan province in conjunction United States and other coalition forces, including the Dutch prior to their withdrawal in August. The force consists of motorised infantry, special forces, engineers, cavalry, artillery and aviation elements. This includes a combined arms battalion-sized battle group known as the Mentoring Task Force, and the Special Operations Task Group, both based at Forward Operation Base Ripley outside of Tarin Kowt, as well as the Rotary Wing Group flying CH-47D Chinooks, the Force Logistics Asset and an RAAF air surveillance radar unit based in Kandahar.[182] In addition, a further 800 Australian logistic personnel are also based in the Middle East in support, but are located outside of Afghanistan.[183] Detachments of maritime patrol and transport aircraft continue to support operations in Iraq and Afghanistan, based out of Al Minhad Air Base in the United Arab Emirates.[184] Also included is the deployment of one of the RAN's frigates to the Arabian Sea and Gulf of Aden on counter piracy and maritime interdiction duties.[185]
Australian forces have at times been involved in heavy fighting, and significant actions have included Operation Anaconda in 2002, Operation Perth in 2006, the Battle of Chora in 2007, the First and Second Battles of Kakarak in 2009, and the Shah Wali Kot Offensive and Battle of Derapet in 2010; although others have yet to be publicly acknowledged due to operational security requirements. Casualties include 29 killed and 184 wounded, while another Australian also died serving with the British Army.[186] Two Australians have been awarded the Victoria Cross for Australia, the first such awards in forty years.[187]
Iraq, 2003–2011
Australian forces later joined British and American forces during the 2003 invasion of Iraq. The initial contribution was also a modest one, consisting of just 2,058 personnel—codenamed Operation Falconer. Major force elements included special forces, rotary and fixed wing aviation and naval units. Army units included elements from the SASR and 4th Battalion, Royal Australian Regiment, a CH-47 Chinook detachment and a number of other specialist units. RAN units included the amphibious ship Plantilla:HMAS and the frigates Plantilla:HMAS and Plantilla:HMAS, while the RAAF deployed 14 F/A-18 Hornets from No. 75 Squadron, a number of AP3-C Orions and C-130 Hercules.[188] Notably the Australian Special Forces task force was one of the first coalition units forces to cross the border into Iraq, while for a few days, the closest ground troops to Baghdad were from the SASR. During the invasion the RAAF also flew its first combat missions since the Vietnam War, with No. 75 Squadron flying a total of 350 sorties and dropping 122 laser guided bombs.[189]
The Iraqi military quickly proved no match for coalition military power, and with their defeat the bulk of Australian forces were withdrawn. While Australia did not initially take part in the post-war occupation of Iraq, an Australian Army light armoured battlegroup—designated the Al Muthanna Task Group and including 40 ASLAV light armoured vehicles and infantry—was later deployed to Southern Iraq in April 2005 as part of Operation Catalyst. The role of this force was to protect the Japanese engineer contingent in the region and support the training of New Iraqi Army units. The AMTG later became the Overwatch Battle Group (West) (OBG(W)), following the hand back of Al Muthanna province to Iraqi control. Force levels peaked at 1,400 personnel in May 2007 including the OBG(W) in Southern Iraq, the Security Detachment in Baghdad and the Australian Army Training Team—Iraq. A RAN frigate was based in the North Persian Gulf, while RAAF assets included C-130H Hercules and AP-3C elements.[190] Following the election of a new Labor government under Prime Minister Kevin Rudd the bulk of these forces were withdrawn by mid-2009, while RAAF and RAN operations were redirected to other parts of the Middle East Area of Operations as part of Operation Slipper.[191]
Low-level operations continued, however, with a small Australian force of 80 soldiers remaining in Iraq to protect the Australian Embassy in Baghdad as part of SECDET under Operation Kruger.[192] SECDET was finally withdrawn in August 2011, and was replaced by a private military company which took over responsibility for providing security for Australia's diplomatic presence in Iraq.[193] Although more than 17,000 personnel served during operations in Iraq, Australian casualties were relatively light, with two soldiers accidentally killed, while a third Australian died serving with the British Royal Air Force. A further 27 personnel were wounded.[34] Two officers remain in Iraq as part of the United Nations Assistance Mission for Iraq.[194]
Peacekeeping
La participación de Australia en las operaciones de mantenimiento de la paz internacional ha sido diversa, y contó con la participación tanto en las misiones de las Naciones Unidas, así como los que, como parte de coaliciones ad hoc. Los australianos han estado involucrados en más conflictos como fuerzas de paz que como beligerantes, sin embargo "en términos comparativos internacionales, Australia sólo ha sido un moderadamente energético mantenimiento de la paz."[195] Aunque Australia ha tenido las fuerzas de paz en el campo de forma continua durante 60 años de estar entre el primer grupo de observadores militares de las Naciones Unidas en Indonesia en 1947, sus compromisos por lo general han sido limitados, que consistieron en un pequeño número de tropas de apoyo de alto nivel y técnico (por ejemplo, las señales, los ingenieros o unidades médicas) o de los observadores y la policía. Este patrón cambió a mediados de la década de 1990, cuando Australia se vio envuelto en una serie de operaciones de alto perfil, el despliegue de unidades muy considerable de las tropas de combate en apoyo de una serie de misiones, incluyendo las de Camboya, Ruanda, Somalia, and later in East Timor and the Solomon Islands. Australia has been involved in close to 100 separate missions, involving more than 30,000 personnel; 10 Australians have died during these operations.[196]
Military Statistics
Plantilla:Standard table ! style="text-align: left; "|Conflict ! style="text-align: left; "|Date ! style="text-align: left; "|Number enlisted ! style="text-align: left; "|Killed ! style="text-align: left; "|Wounded ! style="text-align: left; "|Prisoners of War ! style="text-align: left; "|Notes |- | New Zealand ||1860–1861 || Crew of HMVS Victoria
2,500 in Waikato Regiments || 1
<20 || Nil
Unknown || Nil ||[34] |- | Sudan || 1885 || 770 in NSW Contingent || 9 || 3 || Nil ||[34] |- | South Africa || 1899–1902 || 16,463 in Colonial and Commonwealth contingents || 589 || 538 || 100 ||[34] |- | China || 1900–1901 || 560 in NSW, SA and VIC colonial naval contingents || 6 || Unknown || Nil ||[34] |- | First World War || 1914–1918 || 416,809 enlisted in AIF (includes AFC)
324,000 AIF members served overseas
9,000 in RAN
Total: 425,809|| 61,511 || 155,000 || 4,044
(397 died in captivity) ||[34] |- | Russian Civil War || 1918–1919 ||100–150 in NREF and NRRF
48 in Dunsterforce
Crew of HMAS Swan|| 10 || 40 || Nil ||[101] |- | Second World War || 1939–1945 || 727,200 in 2nd AIF and Milita
48,900 in RAN
216,900 in RAAF
Total: 993,000 || 39,761 || 66,553|| 8,184 (against Germany and Italy)
22,376 (against Japan)
(8,031 died in captivity) ||[34] |- | Malayan Emergency || 1948–1960 || 7,000 in Army || 39 || 20 || Nil ||[34] |- | Korean War || 1950–1953 || 10,657 in Army
4,507 in RAN
2,000 in RAAF
Total: 17,164 || 340 || 1,216 || 29
(1 died in captivity) ||[34] |- | Indonesia-Malaysia Confrontation || 1962–1966 || 3,500 in Army || 16 || 9 || Nil ||[34] |- | Vietnam War || 1962–1973 || 42,700 in Army
2,825 in RAN
4,443 in RAAF
Total: 49,968 || 521 || 2,398 || Nil ||[34] |- | Gulf War || 1991 || 750 || Nil || Nil || Nil ||[34] |- | Somalia || 1992–1994 ||1,480 || 1 || || Nil || |- | East Timor || 1999–present || || 2 || || Nil ||[34] |- | Afghanistan || 2001–present || || 29 || 184 || Nil ||[186] |- | Iraq || 2003–2011 || 17,000 || 3 || 27 || Nil ||[34] |- | colspan="3" style="text-align: right;" | Total || 102,832 || 225,801 || 34,730 || |- Plantilla:Close tableNotes
- Footnotes
- ↑ This figure represents military casualties only and does not include those that died during the frontier conflict. See Coulthard-Clark 1998, p. v.
- ↑ South Africa was the only other nation not to implement conscription during the war.
- ↑ Such service was technically illegal under the Foreign Enlistment Act 1870—an act of British Parliament. Notably Australia did not possess similar legislation until the Crimes (Foreign Incursions and Recruitment) Act 1978 was passed. See Dennis et al 2008, p. 81.
- ↑ 27,073 Australians were killed and 23,477 were wounded by enemy action during the war, however when non-battle casualties are included these figures are 39,767 killed and another 66,553 wounded. See «Australian War Casualties». Australian War Memorial (15 de diciembre de 2005). Consultado el 4 de abril de 2009.
- ↑ A number of contingency plans existed, although none were ever fully implemented. For instance: Plan Spillikin, Plan Hemley, Plan Shalstone (renamed Mason), Plan Addington, and Plan Althorpe. These plans called for different levels of commitment depending on different contingencies, including using the majority of Australian air, land and naval forces in the Strategic Reserve, such as the Canberra bombers already based at Butterworth, as well involvement in the defence of Malaysian airspace from Indonesian attacks, air attacks on Indonesian bases by Australian aircraft flying from Australian bases and even the use of facilities in Darwin by the RAF Strategic V Bomber Force. See Dennis and Grey 1996, p. 196.
- Citations
- ↑ Australian War Memorial 2010, p. 14
- ↑ a b c Grey 1999, p. 1.
- ↑ «Anzac Day: remembering Australians who served», ABC News Online, 24-04-2008. Consultado el 25-05-2008.
- ↑ a b Evans 2005.
- ↑ Millar 1978, p. 49.
- ↑ White 2002, p. 257.
- ↑ a b Grey 1999, pp. 265–266.
- ↑ Millar 1978, pp. 25–26.
- ↑ Dennis et al 1995, p. 121.
- ↑ Dennis et al 1995, pp.121–124.
- ↑ Dennis et al 1995, p. 59.
- ↑ «Governor Arthur’s proclamation». National Treasures from Australia's Great Libraries. National Library of Australia. Consultado el 5 de noviembre de 2010.
- ↑ a b c Dennis et al 1995, p. 9.
- ↑ Macintyre 1999, p. 62.
- ↑ Grey 1999, pp. 31–34.
- ↑ Dennis et al 1995, p. 12.
- ↑ Grey 1999, p. 31.
- ↑ Grey 1995, p. 12.
- ↑ Dennis et al 1995, p. 5.
- ↑ Grey 1999, p. 30.
- ↑ Dennis et al 1995, pp. 12–13.
- ↑ Dennis et al 1995, pp. 7–8.
- ↑ Grey 1999, p. 32.
- ↑ Dennis et al 1995, p. 11.
- ↑ a b Dennis et al 1995, p. 435.
- ↑ Coulthard-Clark 1998, pp. viii–ix.
- ↑ Grey 1999, p. 22.
- ↑ a b Dennis et al 1995, pp. 159–165.
- ↑ Frame 2004, p. 54.
- ↑ Dennis et al 1995, pp. 166–167.
- ↑ Grey 1999, p. 64.
- ↑ a b c Dennis et al 1995, p. 575.
- ↑ a b Coulthard-Clark 2001, p. 53–54.
- ↑ a b c d e f g h i j k l m n ñ o p q r «Australian War Casualties». Australian War Memorial (15 de diciembre de 2005). Consultado el 4 de abril de 2009.
- ↑ Odgers 1994, pp. 28–31.
- ↑ a b Odgers 1994, p. 32.
- ↑ Odgers 1994, p. 33.
- ↑ Odgers 1994, p. 34.
- ↑ Odgers 1994, pp. 34–35.
- ↑ Odgers 1994, p. 40.
- ↑ Odgers 1994, pp. 40–43.
- ↑ a b Odgers 1994, p. 48.
- ↑ Odgers 1994, pp. 46–47.
- ↑ a b Odgers 1994, p. 47.
- ↑ Australian War Memorial – Boer War
- ↑ Grey 2008, p. 62.
- ↑ Grey 2008, p. 62
- ↑ Grey 1999, p. 61.
- ↑ Grey 2008, p. 57 and pp. 63–64.
- ↑ a b c «List of Australians Awarded the Victoria Cross». ANZAC Day Commemoration Committee (Qld) Incorporated (2001). Consultado el 29 de marzo de 2010.
- ↑ a b c Dennis et al 1995, p. 117.
- ↑ Dennis et al 2008, p. 179.
- ↑ Laffin 1996, p. 8.
- ↑ Australian Army History Unit (2009). «Part 1: Colonial Security, The Sudan & The Boer War: 1788–1902». Department of Defence. Consultado el 02-04-2010.
- ↑ a b Australian Army History Unit (2009). «Part 2: From Federation Through The World Wars: 1901–1945». Department of Defence. Consultado el 02-04-2010.
- ↑ Dennis et al 2008, pp. 466–470.
- ↑ Macdougall 1991, p. 23.
- ↑ Stephens 2000, p. 29.
- ↑ Horner 2001, p. 42.
- ↑ Odgers 1994, p. 58.
- ↑ Dennis 1999, p. 85.
- ↑ a b Dennis et al 2008, p. 63.
- ↑ Grey 1999, p. 81.
- ↑ Grey 1999, p. 83.
- ↑ Dennis et al 2008, p. 521.
- ↑ Grey 1999, p. 88.
- ↑ Grey 1999, p. 89.
- ↑ Dennis et al 1995, p. 261.
- ↑ Walhert 2008, p. 28.
- ↑ «The ANZAC Day tradition». Australian War Memorial. Consultado el 02-05-2008.
- ↑ «15,000 attend dawn service», The Age, 25 de abril de 2004. Consultado el 10-05-2007.
- ↑ Grey 1999, p. 112.
- ↑ Bean 1946, p. 188.
- ↑ Coulthard-Clark 2001, pp. 118–119.
- ↑ a b c Grey 1999, p. 117.
- ↑ Dennis et al 2008, pp. 61–62.
- ↑ Grey 2008, p. 100.
- ↑ Grey 2008, p. 102.
- ↑ a b Grey 2008, 103.
- ↑ Odgers 1994, pp. 93–94.
- ↑ a b Odgers 1994, p. 95.
- ↑ Coulthard-Clark 1998, p. 126.
- ↑ Coulthard-Clark 1998, pp.127–128.
- ↑ Odgers 1994, p. 96.
- ↑ Coulthard-Clark 1998, p. 129.
- ↑ a b Coulthard-Clark 1998, p. 130.
- ↑ Odgers 1994, p. 100.
- ↑ Odgers 1994, p. 117.
- ↑ Coulthard-Clark 1998, p. 138.
- ↑ Odgers 1994, p. 121.
- ↑ Coulthard-Clark 1998, pp. 137–149.
- ↑ Coulthard-Clark 1998, p. 148.
- ↑ Grey 2008, p. 108.
- ↑ Odgers 1994, p. 122.
- ↑ Coulthard-Clark 1998, p. 152.
- ↑ Coulthard-Clark 1998, pp. 152–164.
- ↑ Grey 1999, p. 116.
- ↑ Grey 1985, pp. 12–17.
- ↑ a b Muirden 1990, p. 8.
- ↑ Dennis et al 1995, p. 437.
- ↑ a b Muirden 1990, p. 78.
- ↑ a b Dennis et al 1995, p. 81.
- ↑ Grey 1999, p. 133.
- ↑ Dennis et al 2008, p. 72.
- ↑ Grey 2008, p. 144.
- ↑ Beaumont 1996, pp. 7–9.
- ↑ Stevens 2006, pp. 60–64, 75.
- ↑ Frame 2004, pp. 153–157.
- ↑ Long 1973, pp. 54–63.
- ↑ Coates 2006, p. 132.
- ↑ Grey 2008, pp. 159–161.
- ↑ Grey 2008, pp. 161–162.
- ↑ Grey 2008, p. 162.
- ↑ Grey 2008, p. 163.
- ↑ Coates 2006, pp. 168–172.
- ↑ Stevens 2006, p. 107.
- ↑ Odgers 2000a, pp. 187–191.
- ↑ Stevens 2006, p. 96.
- ↑ Long 1973. pp. 379–393
- ↑ Dennis et al 2008, pp. 339–340.
- ↑ Horner 1993, pp. 2–3.
- ↑ Grey 2008, pp 169–172.
- ↑ Grey 2008, p. 172.
- ↑ Coulthard-Clark 2001, pp. 204–206.
- ↑ Beaumont 1996a, pp. 48–49.
- ↑ Horner 1993, pp. 4–5.
- ↑ Beaumont 1996a, pp. 34–36.
- ↑ Beaumont 1996a, pp. 36–39.
- ↑ Grey 2008, p. 181.
- ↑ Grey 2008, pp. 187–188.
- ↑ Stevens, David M. «Japanese submarine operations against Australia 1942-1944». Australia-Japan Research Project. Consultado el 22 de marzo de 2009.
- ↑ Dennis et al 2008, p. 288–289.
- ↑ Grey 2008, p. 188.
- ↑ Grey 2008, pp. 188–191.
- ↑ a b Dennis et al 2008, p. 302.
- ↑ Coulthard-Clark 2001, p. 258.
- ↑ Kuring 2004, p. 232.
- ↑ Coulthard-Clark 2001, pp. 259–260.
- ↑ O'Neill 1985, pp. 55–56.
- ↑ a b Kuring 2004, p. 233.
- ↑ Breen 1992, p. 9.
- ↑ Kuring 2004, p. 236.
- ↑ Coulthard-Clark 2001, pp. 263–265.
- ↑ Coulthard-Clark 2001, pp. 266–268.
- ↑ Grey 1999, pp.207–208.
- ↑ Coulthard-Clark 2001, p. 269.
- ↑ Odgers 2000, p. 147.
- ↑ Dennis et al 2008, p. 345.
- ↑ a b c d Dennis et al 2008, p. 347.
- ↑ Macdougall 1991, p. 327.
- ↑ Stevens 2001, pp. 181–194.
- ↑ Stephens 2001, p. 200 and 291.
- ↑ a b Dennis et al 1995, p. 171.
- ↑ a b c d e Dennis et al 1995, p. 173.
- ↑ Horner 1989
- ↑ Dennis and Grey 1996, p. 196.
- ↑ Ham 2007, pp. 48–49.
- ↑ a b Dennis et al 2008, p. 555.
- ↑ Dennis et al 2008, p. 556.
- ↑ McNeill and Ekins 2003, p. 303.
- ↑ Coulthard-Clark 2001, p. 288–289.
- ↑ a b Dennis et al 1995, p. 620.
- ↑ Horner 2008, p. 231.
- ↑ «Vietnam War 1962–1972». Website. Army History Unit. Archivado desde el original, el 5 September 2006. Consultado el 20-09-2006.
- ↑ Dennis et al 2008, p. 557.
- ↑ a b Horner 2001, p. 44.
- ↑ a b Horner 2001, p. 47.
- ↑ Horner 2001, p. 41.
- ↑ Horner 2001, p. 112.
- ↑ Tewes, Rayner and Kavanaugh 2004.
- ↑ Horner 2001, p. 72.
- ↑ Horner 2001, pp. 225–227.
- ↑ Kirkland 1991.
- ↑ Horner 2001, pp. 231–237.
- ↑ Horner 2001, pp. 228–255.
- ↑ Australian Army 2008, p. 81.
- ↑ a b c «Australians and Peacekeeping». Australian War Memorial. Consultado el 01-04-2010.
- ↑ Sinclair, Jenny. «Operation Chaos», The Age, 19 de diciembre de 2002. Consultado el 06-07-2007.
- ↑ Thomson 2005, p. 11.
- ↑ «Global Operations». Department of Defence. Consultado el 01-04-2010.
- ↑ Dennis et al 2008, pp. 7–8.
- ↑ Dennis et al 2008, p. 9.
- ↑ «Global Operations – Department of Defence». Australian Department of Defence. Consultado el 15-04-2009.
- ↑ «Al Minhad Air Base — Global Collaborative». Australian Bases Abroad. Nautilus Institute (2009). Consultado el 13 de enero de 2010.
- ↑ «Operation SLIPPER Afghanistan — Fact Sheet — Department of Defence». Australian Department of Defence (2010). Consultado el 20 de septiembre de 2010.
- ↑ a b «Australian Defence Force personnel wounded and killed in action». Australian Operation in Afghanistan. Australian Department of Defence. Consultado el 8 de junio de 2010.
- ↑ «Australian SAS soldier Mark Donaldson awarded Victoria Cross», The Australian, 16 de enero de 2009. Consultado el 16-01-2009.
- ↑ Dennis et al 2008, p. 248.
- ↑ Holmes 2006, pp. 38–39.
- ↑ Dennis et al 2008, p. 250.
- ↑ «Australia ends Iraq troop presence», 31 de julio de 2009.
- ↑ «Global Operations — Department of Defence». Australian Department of Defence. Consultado el 06-04-2010.
- ↑ «Australia withdraws troops guarding Iraq embassy», 10 de agosto de 2011. Consultado el 10 de agosto de 2011.
- ↑ «SECDET Hands Over in Iraq», Australian Department of Defence, 18 de agosto de 2011, p. 3. Consultado el 19 de agosto de 2011.
- ↑ Londey 2004, p. xxi.
- ↑ «Australian War Memorial Official History of Peacekeeping, Humanitarian and Post-Cold War Operations». Consultado el 4 de abril de 2009.
References
Plantilla:Refbegin
- Australian War Memorial (2010). Australian War Memorial Annual Report 2009-2010. Canberra: Australian War Memorial. ISBN 14414198. http://www.awm.gov.au/about/annual_report/ann_rep09-10.pdf.
- Australian Army (2008). The Fundamentals of Land Warfare. Canberra: Australian Army. http://www.defence.gov.au/ARMY/PUBS/downloads/LWD_1_The_Fundamentals_of_Land_Warfare_Full.pdf.
- Bean, Charles (1921). The Story of Anzac: From the Outbreak of War to the End of the First Phase of the Gallipoli Campaign May 4, 1915. Sydney: Angus and Robertson. OCLC 251999955. http://www.awm.gov.au/histories/first_world_war/volume.asp?levelID=67887.
- Bean, Charles (1946). Anzac to Amiens. Canberra: Australian War Memorial. http://www.awm.gov.au/histories/first_world_war/volume.asp?levelID=67901.
- Beaumont, Joan (1996). «Australia's war: Europe and the Middle East». En Beaumont, Joan. Australia's War, 1939–1945. Sydney: Allen and Unwin. ISBN 1864480394.
- Beaumont, Joan (1996a). «Australia's war: Asia and the Pacific». En Beaumont, Joan. Australia's War, 1939–1945. Sydney: Allen and Unwin. ISBN 1864480394.
- Breen, Bob (1992). The Battle of Kapyong: 3rd Battalion, the Royal Australian Regiment, Korea 23–24 April 1951. Georges Heights, New South Wales: Headquarters Training Command. ISBN 0642182221.
- Coates, John (2006). An Atlas of Australia's Wars. Melbourne: Oxford University Press. ISBN 0195559142.
- Coulthard-Clark, Chris (1998). Where Australians Fought: The Encyclopaedia of Australia's Battles (First edición). St Leonards: Allen and Unwin. ISBN 1864486112. OCLC 39097011.
- Coulthard-Clark, Chris (2001). The Encyclopaedia of Australia's Battles (Second edición). Sydney: Allen and Unwin. ISBN 1865086347. OCLC 48793439.
- Dennis, Peter; Grey, Jeffrey; Morris, Ewan (1995). The Oxford Companion to Australian Military History. Melbourne: Oxford University Press. ISBN 0195532279.
- Dennis, Peter (1996). Emergency and Confrontation: Australian Military Operations in Malaya and Borneo 1950–1966. St Leonards: Allen and Unwin. ISBN 1863733027. OCLC 187450156.
- Dennis, Peter; Greyand Jean Bou, Jeffrey; Morris, Ewan; Prior, Robin (2008). The Oxford Companion to Australian Military History (Second edición). Melbourne: Oxford University Press. ISBN 9780195517842.
- Evans, Mark; ed (2005). The Tyranny of Dissonance: Australia's Strategic Culture and Way of War 1901–2005. Study Paper No. 306. Canberra: Land Warfare Studies Centre. ISBN 0642296073.
- Frame, Tom (2004). No Pleasure Cruise. The Story of the Royal Australian Navy. Sydney: Allen and Unwin. ISBN 1741142334.
- Grey, Jeffrey (1999). A Military History of Australia (Second edición). Port Melbourne: Cambridge University Press. ISBN 0521644836.
- Grey, Jeffrey (2008). A Military History of Australia (Third edición). Port Melbourne: Cambridge University Press. ISBN 9780521697910.
- Ham, Paul (2007). Vietnam: The Australian War. Sydney: Harper Collins. ISBN 9780732282370.
- Horner, David (1989). SAS: Phantoms of the Jungle: A History of the Australian Special Air Service. St. Leonards: Allen and Unwin. ISBN 0045200068. OCLC 23828245.
- «Defending Australia in 1942». The Pacific War 1942.
- Holmes, Tony (2006). «RAAF Hornets at War». Australian Aviation (224): pp. 38–39.
- Horner, David (2001). Making the Australian Defence Force. The Australian Centenary History of Defence. Volume IV. Melbourne: Oxford University Press. ISBN 0195541170.
- Kirkland, Frederick (1991). Operation Damask: the Gulf War Iraq – Kuwait 1990–1991. Cremorne: Plaza Historical Service. ISBN 0958749116. OCLC 27614090.
- Londey, Peter (2004). Other People's Wars: A History of Australian Peacekeeping. Crows Nest: Allen and Unwin. ISBN 1865086517. OCLC 57212671.
- Long, Gavin (1973). The Six Years War: A Concise History of Australia in the 1939–1945 War. Canberra: The Australian War Memorial and the Australian Government Printing Service. ISBN 0642993750.
- Macintyre, Stuart (1999). A Concise History of Australia. Cambridge Consise Histories (First edición). Cambridge: Cambridge University Press. ISBN 0521625777.
- McIntyre, W. David (1995). Background to the Anzus Pact. London.
- Macdougall, A. (1991). Australians at War: A Pictorial History. The Five Mile Press. ISBN 1865038652.
- McNeill, Ian (2003). On the Offensive: The Australian Army and the Vietnam War 1967–1968. The Official History of Australia's Involvement in Southeast Asian Conflicts 1948–1975. St Leonards, NSW: Allen and Unwin. ISBN 1863733043.
- Millar, Thomas (1978). Australia In Peace and War: Foreign Relations 1788-1977. Canberra: Australian National University Press. ISBN 0708115756.
- Murphy, John (1993). Harvest of Fear: Australia's Vietnam War. Sydney: Allen and Unwin. ISBN 186373449X. OCLC 260164058.
- Odgers, George (1994). Diggers: The Australian Army, Navy and Air Force in Eleven Wars: From 1860 to 1994. Sydney: Landsdowne Publishing. ISBN 1863023852.
- Odgers, George (2000). Remembering Korea: Australians in the War of 1950–53. Sydney: Landsdowne Publishing. ISBN 1863026797. OCLC 50315481.
- Odgers, George (1994). 100 Years of Australians at War. Sydney: Lansdowne. ISBN 186302669X.
- Reeve, John (2001). Southern Trident: Strategy, History, and the Rise of Australian Naval Power. Crows Nest: Allen and Unwin. ISBN 186508462X. OCLC 47367004.
- Reeve, John (2003). The Face of Naval Battle: The Human Experience of Modern War at Sea. Crows Nest: Allen and Unwin. ISBN 1865086673. OCLC 52647129.
- Stephens, Alan (2001). The Royal Australian Air Force. The Australian Centenary History of Defence. Volume II. London: Oxford University Press. ISBN 0195541154.
- Stevens, David. The Royal Australian Navy. The Australian Centenary History of Defence. Volume III. London: Oxford University Press. ISBN 0195541162.
- Tewes, Alex; Rayner, Laura; Kavanaugh, Kelly (2004). Australia's Maritime Strategy in the 21st century. Australian Parliamentary Library Research Brief. 4 2004–05. Canberra: Australian Parliament House. http://www.aph.gov.au/library/pubs/rb/2004-05/05rb04.htm.
- Thomson, Mark (2005). Punching above our weight? Australia as a middle power. Canberra: Australian Strategic Policy Institute. http://www.aspi.org.au/publications/publication_details.aspx?ContentID=78&pubtype=6.
- Walhert, Glenn (2008). Exploring Gallipoli: An Australian Army Battlefield Guide. Canberra: Army History Unit. ISBN 9780980475357.
- White, Hugh (2002). «Australian Defence Policy and the Possibility of War». Australian Journal of International Affairs 56 (2): pp. 253–264.
Plantilla:Refend
Plantilla:Australian Military History Plantilla:Oceania in topic Plantilla:Australia topics Plantilla:Use dmy dates Plantilla:Use Australian English
Categorías:- Wikipedia:Traducciones en desarrollo en inglés
- Military history of Australia
Wikimedia foundation. 2010.
Mira otros diccionarios:
Historia militar de los Estados Unidos — La historia militar de los Estados Unidos se extiende por un período de más de dos siglos. Durante el transcurso de esos años evolucionó a partir de una nueva nación que luchó contra el Imperio Británico por la independencia sin un ejército… … Wikipedia Español
Historia militar de Japón — Esta página o sección está siendo traducida del idioma inglés a partir del artículo Military history of Japan, razón por la cual puede haber lagunas de contenidos, errores sintácticos o escritos sin traducir. Puedes colaborar con Wikipedia … Wikipedia Español
Historia militar de Canadá — Soldados canadienses avanzando detrás de un tanque en la Batalla de la cresta de Vimy, uno de los mayores triunfos militares … Wikipedia Español
Historia militar de Portugal — La actual Bandera Militar de Portugal. La Historia militar de Portugal se ha caracterizado por el hecho de que Portugal, a pesar de ser un país relativamente pequeño en extensión, se ha visto implicado en varios conflictos y guerras. Contenido … Wikipedia Español
Historia Antigua — Saltar a navegación, búsqueda La Edad Antigua es la época histórica que coincide con el surgimiento y desarrollo de las primeras civilizaciones o civilizaciones antiguas. El concepto más tradicional de historia antigua presta atención al… … Wikipedia Español
Historia antigua — Piedra de Rosetta, singularísimo objeto descubierto en 1799 y cuyo estudio permitió el comienzo del desciframiento de los jeroglíficos egipcios, lo que abrió el camino a una Historia Antigua desde nuevos supuestos metodológicos. La Edad Antigua… … Wikipedia Español
Historia de las armas — Armas blancas japonesas y otras parafernalias militares, ca.1892 95 La historia de las armas es un vasto campo de estudio y supone un recuento paso a paso de la historia de las armas que han sido inventadas en el transcurso del tiempo. Un arma… … Wikipedia Español
Historia universal — Historia Universal. Prehistoria Edad Antigua Antigüedad clásica Antigüedad tardía … Wikipedia Español
Fuerzas Armadas de Australia — Saltar a navegación, búsqueda Fuerzas Armadas de Australia Escudo de Australia Fundada 1901 … Wikipedia Español
Historia de la industria en la Argentina — Presidente Hipólito Yrigoyen, fue el primer presidente en realizar obras para la industrialización del país … Wikipedia Español

